VPSで最低限行う事を整理しました。
さくらのVPS![]() で行っています。
で行っています。
さくらのVPS![]() では、バージョンアップを行うようで
では、バージョンアップを行うようで
・HDDプランの廃止
・SDDの容量を倍増レベルに
・既存のV4の方も恩恵を受けられる
・初期費用なしに
という事が発表されています。
楽しみなバージョンアップですーー
さくらインターネット、「さくらのVPS」「さくらのVPS for Windows Server」のリニューアルを実施
CentOS8版は、WordPress最速インストール CentOS 8へ(2020/05/06)
さくらVPS、サーバの起動
サーバの申し込みをすると案内が来て、コントロールパネルからアクセスができます。
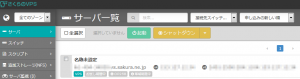
↑「名称未設定」というサーバー名が登録されます。
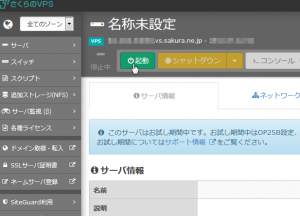
↑「名称未設定」をクリックして、左上の「起動」ボタンを押します。
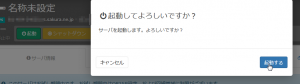
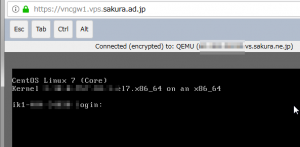
↑起動されました
さくらVPS、パケットフィルタ
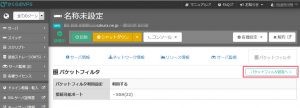
↑画面上の「パケットフィルタ」の設定を行います。
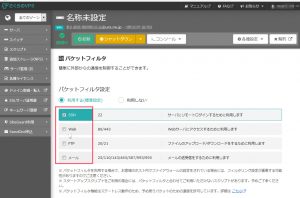
↑上記のチェックボックスをクリックします。
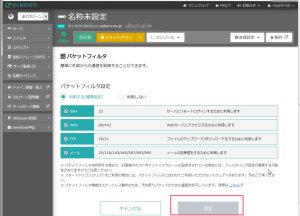
↑設定を行います。
CentOSのバージョン
# cat /etc/centos-release
CentOS Linux release 7.7.1908 (Core)
↑現状、デフォルトで、インストールされている、CentOSのバージョンです。
7.7です。
CentOS8もインストールできるようです・・・
firewallを起動
systemctl status firewalld.service
systemctl start firewalld.service
systemctl enable firewalld.service
↑デフォルトでは、firewallが起動されていないです。
さくらVPSでは、「パケットフィルタ」がデフォルトで「ON」になっています。
パケットフィルタのほうも留意します。
sshポート変更(任意)
sshの22番ポートは、よく知られたポートで、SSHを突破できないかと、常時アタックされています。
22番ポートを違うポートに変更すると、さくらVPSのパケットフィルタは適用できなくなりますので、留意が必要です。
# cp /usr/lib/firewalld/services/ssh.xml /etc/firewalld/services/ssh-xxxxx.xml
# vi /etc/firewalld/services/ssh-xxxxx.xml

port="22"
↓
port="xxxxx"
↑「xxxxx」は、任意の数字(ポート)です。
# firewall-cmd --permanent --add-service=ssh-xxxxx
# firewall-cmd --reload
↑「xxxxx」は、数字です。firewallで、解放するように、設定をします。
# vi /etc/ssh/sshd_config

#Port 22
↓
Port xxxxx
↑sshサービスのポートも変更をします。「xxxxx」は、数字です。
# systemctl restart sshd
# firewall-cmd --permanent --remove-service=ssh
# firewall-cmd --reload
↑sshサービスを再起動して、firewallの22番を削除します。
MySQLインストール (2019/11/07更新)
# yum update
# yum groupinstall "Development Tools"
# yum install openssl-devel
↑ツール類を入れます。「Developmet Tools」は、既に入っているので、何もインストールされないと思います。
# yum remove mariadb-libs
↑デフォルトで入っている、mariaDBを、アンインストールします。
↑修正。削除不要。mysqlインストール時に削除されます(2020/1/11)
# rpm -ivh http://dev.mysql.com/get/mysql57-community-release-el7-11.noarch.rpm
# yum install mysql-community-server
# mysqld --version
mysqld  Ver 5.7.27 for Linux on x86_64 (MySQL Community Server (GPL))
↑MySQL5.7を入れます。
# vi /etc/my.cnf

character-set-server=utf8

[client]
default-character-set=utf8
↑設定ファイル、utf8を基本とします。3行を書き加えます。(2019/11/07 更新)
↑[client]のところは不要でした。(2020/05/17)
character-set-server=utf8
は、[mysqld]セクションのところに書きます。最後に書き加えて大丈夫でしょう。
(このバージョンでは)
# systemctl start mysqld.service
# systemctl enable mysqld.service
↑MySQL5.7の起動と、自動起動を設定します。
↓MySQLを設定します。
# cat /var/log/mysqld.log | grep password
2019-XX-XXT12:27:39.212225Z 1 [Note] A temporary password is generated for root@localhost: (デフォルトパスワード)
# mysql_secure_installation

Securing the MySQL server deployment.

Enter password for user root:
(↑(デフォルトパスワード)を入れます)

The existing password for the user account root has expired. Please set a new password.

New password: (新しいパスワード)

Re-enter new password:  (新しいパスワード)
The 'validate_password' plugin is installed on the server.
The subsequent steps will run with the existing configuration
of the plugin.
Using existing password for root.

Estimated strength of the password: 100
Change the password for root ? ((Press y|Y for Yes, any other key for No) : n
(↑パスワードの複雑さが既定に達しているというメッセージ。「n」を入力します)

 ... skipping.
By default, a MySQL installation has an anonymous user,
allowing anyone to log into MySQL without having to have
a user account created for them. This is intended only for
testing, and to make the installation go a bit smoother.
You should remove them before moving into a production
environment.

Remove anonymous users? (Press y|Y for Yes, any other key for No) : y
Success.
(↑匿名で入れるユーザを消すかという確認。「y」を入れます。)

Normally, root should only be allowed to connect from
'localhost'. This ensures that someone cannot guess at
the root password from the network.

Disallow root login remotely? (Press y|Y for Yes, any other key for No) : y
Success.

(↑「root」ユーザを遠隔から入ることを禁止するか。という問い。「y」を入れます。)

By default, MySQL comes with a database named 'test' that
anyone can access. This is also intended only for testing,
and should be removed before moving into a production
environment.


Remove test database and access to it? (Press y|Y for Yes, any other key for No) : y
 - Dropping test database...
Success.

(↑「test」というテスト用のDBを消すか。という問い。「y」を入れます。)

 - Removing privileges on test database...
Success.

Reloading the privilege tables will ensure that all changes
made so far will take effect immediately.

Reload privilege tables now? (Press y|Y for Yes, any other key for No) : y
Success.

(↑最終的にOKか?という問い。「y」を入れます。)

All done!
↑設定が完了
ワードプレス用DB設定
# mysql -u root -p
(パスワードを入れます)
> use mysql

> insert into user (host,User,authentication_string,ssl_cipher,x509_issuer,x509_subject) values ('localhost','wp_user1',password('パスワード'),'','','');

> insert into db (host,db,user) values ('localhost','wp_db','wp_user1');
Query OK, 1 row affected (0.00 sec)

> update db set Select_priv='Y',Insert_priv='Y',Update_priv='Y',Delete_priv='Y',Create_priv='Y',Drop_priv='Y',Grant_priv='Y',References_priv='Y',Index_priv='Y',Alter_priv='Y',Create_tmp_table_priv='Y',Lock_tables_priv='Y',Create_view_priv='Y',Show_view_priv='Y',Create_routine_priv='Y',Alter_routine_priv='Y',Execute_priv='Y',Event_priv='Y',Trigger_priv='Y' where db='wp_db';

> create database wp_db;

> flush privileges;
httpd インストール、設定
# yum install httpd
# httpd -version
Server version: Apache/2.4.6 (CentOS)
Server built:   Aug  8 2019 11:41:18
↑httpdがインストールされました。
vi /etc/httpd/conf/httpd.conf

<Directory "/var/www/html">
のセクション
↑ワードプレスのコンテンツを、「/var/www/html」におきますので・・・
Options Indexes FollowSymLinks
 ↓
Options All -Indexes +SymLinksIfOwnerMatch -FollowSymLinks

AllowOverride None
 ↓
AllowOverride AuthConfig FileInfo Indexes Limit Options=MultiViews,Indexes
↑上記の「<Directory “/var/www/html”>」のセクションの「Options」と「AllowOverride」のところを、上記のように変更します。(2019/10/24追記)
# systemctl start httpd.service
# systemctl enable httpd.service
↑httpdの起動と自動起動を行います。
# firewall-cmd --add-service=http --zone=public --permanent
# firewall-cmd --add-service=https --zone=public --permanent
# firewall-cmd --reload
↑80ポートとSSLのポートを空けます。
php インストール、設定
# wget https://dl.fedoraproject.org/pub/epel/epel-release-latest-7.noarch.rpm
# rpm -ivh epel-release-latest-7.noarch.rpm
# yum install -y http://rpms.famillecollet.com/enterprise/remi-release-7.rpm
# yum-config-manager --enable remi-php73
# yum-config-manager --enable remi-php73
-bash: yum-config-manager: command not found
↑と、出てしまったら、
# yum install yum-utils
↑と、yum-utilsをインストールします。
# yum install php73 php73-php httpd mod_ssl
# yum install --enablerepo=remi,remi-php73 php php-mbstring php-xml php-xmlrpc php-gd php-pdo php-mysqlnd php-pecl-mysql php-pecl-zip php-pecl-apc
( # yum install --enablerepo=remi,remi-php73 php73-php-mysqlnd php73-php-mbstring から変更。2019/10/24 追記)
↑ PHP 7.3を入れます。
# ln -s /usr/bin/php73 /usr/bin/php
# php -v
PHP 7.3.10 (cli) (built: Sep 24 2019 09:20:18) ( NTS )
Copyright (c) 1997-2018 The PHP Group
Zend Engine v3.3.10, Copyright (c) 1998-2018 Zend Technologies
php 7.3.10が入りました。
php と httpd の連携
# vi /etc/httpd/conf/httpd.conf
AddType application/x-httpd-php .php
↑.phpの拡張子の設定をします。1行を加えます。
# systemctl stop httpd.service
# systemctl start httpd.service
vsftpd (2019/10/22 修正)
FTPサーバーである、vsftpを入れます。
proftpは、「Proftpd for SSL/TSL ,CentOS7」へ
# yum install vsftpd

# vi /etc/vsftpd/vsftpd.conf

anonymous_enable=YES
↓
anonymous_enable=NO

listen=NO
↓
listen=YES

listen_ipv6=YES
↓
listen_ipv6=NO

#ascii_upload_enable=YES
#ascii_download_enable=YES
↓
ascii_upload_enable=YES
ascii_download_enable=YES

#chroot_local_user=YES
↓
chroot_local_user=NO

#chroot_list_enable=YES
↓
chroot_list_enable=YES


#chroot_list_file=/etc/vsftpd/chroot_list
↓
chroot_list_file=/etc/vsftpd/chroot_list

# 上記ファイルに、FTPのユーザ名を書く。(「他のユーザ名を知られたくない」ユーザを書く)

#ls_recurse_enable=YES
↓
ls_recurse_enable=YES

 (以下は、追加)
pam_service_name=vsftpd
userlist_enable=NO
tcp_wrappers=YES
use_localtime=YES
userlist_deny=NO
# systemctl start vsftpd
# systemctl enable vsftpd
# firewall-cmd --add-service=ftp --permanent
# firewall-cmd --reload
# cd ~(FTPユーザ名)
# chmod a-w ./.
↑FTPユーザの書き込み権限をなくします。
FTPユーザのホームディレクトリが、「書き込み権限」があると
500 OOPS: vsftpd: refusing to run with writable root inside chroot()
というエラーになります。
wordpress インストール、設定
# cd /var/www/
# wget https://ja.wordpress.org/latest-ja.tar.gz
# tar xzvf latest-ja.tar.gz
# mv html/ html.back
# mv wordpress/ html
# chown -R ftpuser.100 html
↑ワードプレスの最新版をダウンロード、「/var/www/html」に設定します。
# cd html
# cp -a wp-config-sample.php wp-config.php
# vi wp-config.php

define('DB_NAME', 'database_name_here');
define('DB_USER', 'username_here');
define('DB_PASSWORD', 'password_here');
↑上記をMySQLにて設定した、ユーザ名、パスワード、DB名を設定します。
define('AUTH_KEY',         'put your unique phrase here');
define('SECURE_AUTH_KEY',  'put your unique phrase here');
define('LOGGED_IN_KEY',    'put your unique phrase here');
define('NONCE_KEY',        'put your unique phrase here');
define('AUTH_SALT',        'put your unique phrase here');
define('SECURE_AUTH_SALT', 'put your unique phrase here');
define('LOGGED_IN_SALT',   'put your unique phrase here');
define('NONCE_SALT',       'put your unique phrase here');
上記を
Salt
で表示されたものに入れ替えます。
httpd、サーバー設定
vi /etc/httpd/conf.d/virtual.conf

<VirtualHost XXX.XXX.XXX.XXX:80>
ServerName (ドメイン名、FQDN)
DocumentRoot /var/www/html

</VirtualHost>
↑「XXX.XXX.XXX.XXX」は、さくらVPSから割り当てられた、グローバルIPアドレス。
「ドメイン名」も設定します。
# systemctl stop httpd.service
# systemctl start httpd.service
↑httpdを再起動します。
↑ http://FQDN/にアクセスします。
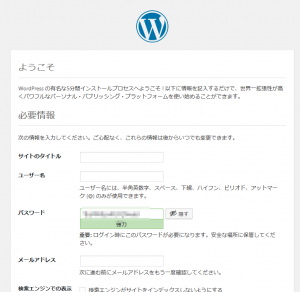
ワードプレスの初期画面が表示されます。
ワードプレス用ログインIDとパスワードを設定します。
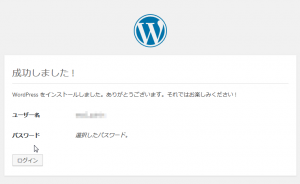
↑設定が完了しました。
Let’s Encrypt (SSL)
# yum install certbot
# wget https://dl.eff.org/certbot-auto
# chmod 755 certbot-auto
#./certbot-auto certonly --non-interactive --agree-tos --webroot -w /var/www/html -d (FQDN) --email (メールアドレス)

IMPORTANT NOTES:
 - Congratulations! Your certificate and chain have been saved at:
   /etc/letsencrypt/live/(FQDN)/fullchain.pem
   Your key file has been saved at:
   /etc/letsencrypt/live/(FQDN)/privkey.pem
   Your cert will expire on 2020-xx-xx. To obtain a new or tweaked
   version of this certificate in the future, simply run certbot-auto
   again. To non-interactively renew *all* of your certificates, run
   "certbot-auto renew"
↑証明書が発行されました。
SSLのhttpd設定
vi /etc/httpd/conf.d/ssl.conf


<VirtualHost _default_:443>

---
</VirtualHost>
↑上記のVirtualHost部分を削除
<VirtualHost XXX.XXX.XXX.XXX:443>
ServerName (FQDN)
DocumentRoot /var/www/html

SSLProtocol all -SSLv2 -SSLv3

SSLEngine on
SSLCertificateFile /etc/letsencrypt/live/(FQDN)/fullchain.pem
SSLCertificateChainFile /etc/letsencrypt/live/(FQDN)/fullchain.pem
SSLCertificateKeyFile /etc/letsencrypt/live/(FQDN)/privkey.pem
</VirtualHost>
↑代わりに、上記のVirtualHostを追加
# systemctl stop httpd.service
# systemctl start httpd.service
↑httpdのサービスを再起動します。
https://(FQDN)/
と、「https」でアクセスをして、接続されることを確認します。
ワードプレスにログインして、プラグイン
「Really Simple SSL」を入れます。
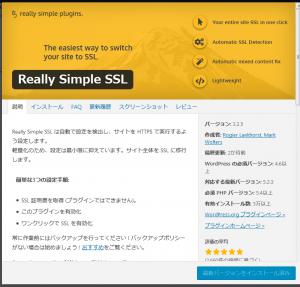
https://ja.wordpress.org/plugins/really-simple-ssl/
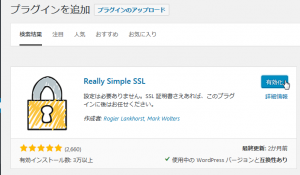
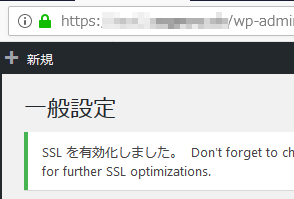
↑SSL、設定完了しました。
.htaccess調整
# vi /var/www/html/.htaccess

# vi .htaccess
<IfModule mod_rewrite.c>
    RewriteEngine on
    RewriteCond %{HTTPS} off
    RewriteRule ^(.*)$ https://%{HTTP_HOST}%{REQUEST_URI} [R,L]
</IfModule>


# BEGIN WordPress
<IfModule mod_rewrite.c>
RewriteEngine On
RewriteBase /
RewriteRule ^index\.php$ - [L]
RewriteCond %{REQUEST_FILENAME} !-f
RewriteCond %{REQUEST_FILENAME} !-d
RewriteRule . /index.php [L]
</IfModule>
↑80番ポート(非SSLポート)に来たら、443ポート(SSLポート)に自動的にリダイレクトする設定と、ワードプレスの設定です。
#chown ftpuser.100 /var/www/html/.htaccess
メールの設定(2019/10/24 追記)
# yum install sendmail sendmail-cf
# systemctl start sendmail
# systemctl enable sendmail
↑メールの設定。これで、メールが届くようになるでしょう
![]()