
VPSサーバーに、WordPressをインストール。
ワードプレス、最速でVPSにインストール
の、CentOS8 版です。
CentOS8も、既にスタンダードになってきています。
CentOS7との違いをわかっていれば、簡単にインストールができます。
今回は、ConoHaVPS
![]() で、行いました。
で、行いました。
CentOS8.1を選ぶことができます。
![]()
# cat /etc/centos-release
CentOS Linux release 8.1.1911 (Core)
と、インストール直後に、CentOS 8.1 が入ります。
yum から dnf へ
yumが、「dnf」コマンドになります。
# dnf check-update
↑で、アップデートできる情報をチェック
# dnf upgrade-minimal
Last metadata expiration check: 0:02:07 ago on Tue 05 May 2020 09:42:11 AM JST.
No security updates needed, but 61 updates available
Dependencies resolved.
Nothing to do.
Complete!
↑「dnf upgrade-minimal」で、重要なものだけを更新する。今回(上記)は、ナシ。
# dnf upgrade
↑で、インストール済みのものを更新する
yum の「# yum update」。
# dnf upgrade
Last metadata expiration check: 0:02:17 ago on Tue 05 May 2020 09:42:11 AM JST.
Dependencies resolved.
====================================================================================================================================================================
 Package                                     Architecture            Version                                                       Repository                  Size
====================================================================================================================================================================
Installing:
 kernel                                      x86_64                  4.18.0-147.8.1.el8_1                                          BaseOS                     1.5 M
 kernel-core                                 x86_64                  4.18.0-147.8.1.el8_1                                          BaseOS                      25 M
 kernel-modules                              x86_64                  4.18.0-147.8.1.el8_1                                          BaseOS                      22 M
Upgrading:

(略)

  sssd-nfs-idmap-2.2.0-19.el8_1.1.x86_64                                    sssd-proxy-2.2.0-19.el8_1.1.x86_64
  sudo-1.8.25p1-8.el8_1.1.x86_64                                            systemd-239-18.el8_1.5.x86_64
  systemd-libs-239-18.el8_1.5.x86_64                                        systemd-pam-239-18.el8_1.5.x86_64
  systemd-udev-239-18.el8_1.5.x86_64                                        epel-release-8-8.el8.noarch

Installed:
  kernel-4.18.0-147.8.1.el8_1.x86_64   kernel-core-4.18.0-147.8.1.el8_1.x86_64   kernel-modules-4.18.0-147.8.1.el8_1.x86_64

Complete!
↑dnf (yum)で、アップデート完了!
# dnf groupinstall "Development Tools"
↑従来通り、groupinstallもできる。
firewall
centOS7でも使っていた、firewallは、CentOS8でも同じように利用できます。
# systemctl status firewalld.service
● firewalld.service - firewalld - dynamic firewall daemon
   Loaded: loaded (/usr/lib/systemd/system/firewalld.service; enabled; vendor preset: enabled)
   Active: active (running) since Tue 2020-05-05 09:46:02 JST; 10min ago
     Docs: man:firewalld(1)
 Main PID: 6670 (firewalld)
    Tasks: 2 (limit: 5056)
   Memory: 20.7M
   CGroup: /system.slice/firewalld.service
           └─6670 /usr/libexec/platform-python -s /usr/sbin/firewalld --nofork --nopid
↑firewallは、起動されています。
sshポート変更
# firewall-cmd --list-all
public (active)
  target: default
  icmp-block-inversion: no
  interfaces: eth0
  sources:
  services: cockpit dhcpv6-client ssh
  ports:
  protocols:
  masquerade: no
  forward-ports:
  source-ports:
  icmp-blocks:
  rich rules:

# cp /usr/lib/firewalld/services/ssh.xml /etc/firewalld/services/ssh-XXXXX.xml
# vi /etc/firewalld/services/ssh-XXXXX.xml
# firewall-cmd --permanent --add-service=ssh-XXXXX
success
# firewall-cmd --reload
success
# firewall-cmd --list-all
public (active)
  target: default
  icmp-block-inversion: no
  interfaces: eth0
  sources:
  services: cockpit dhcpv6-client ssh ssh-XXXXX
  ports:
  protocols:
  masquerade: no
  forward-ports:
  source-ports:
  icmp-blocks:
  rich rules:
↑標準ポートではなく、「XXXXX」番ポートを空けます。
# vi /etc/ssh/sshd_config

#Port 22
↓
Port=xxxxx
# systemctl restart sshd
↑sshのサービス、標準ポートの「22」番から、「XXXXX」番に変更して、sshを再起動します。
# firewall-cmd --permanent --remove-service=ssh
success
# firewall-cmd --reload
success
# firewall-cmd --list-all
public (active)
  target: default
  icmp-block-inversion: no
  interfaces: eth0
  sources:
  services: cockpit dhcpv6-client ssh-XXXXX
  ports:
  protocols:
  masquerade: no
  forward-ports:
  source-ports:
  icmp-blocks:
  rich rules:
↑ssh標準の「22」番ポートを削除します。
MySQL 8.0
# dnf search mysql |grep server
Last metadata expiration check: 0:22:37 ago on Tue 05 May 2020 09:48:38 AM JST.

voms-mysql-plugin.src : VOMS server plugin for MySQL
mysql-server.x86_64 : The MySQL server and related files
kf5-akonadi-server-mysql.x86_64 : Akonadi MySQL backend support
↑標準のMySQLを探します。
# dnf info mysql-server.x86_64
Last metadata expiration check: 0:21:29 ago on Tue 05 May 2020 09:48:38 AM JST.
Available Packages
Name         : mysql-server
Version      : 8.0.17
Release      : 3.module_el8.0.0+181+899d6349
Architecture : x86_64
Size         : 22 M
Source       : mysql-8.0.17-3.module_el8.0.0+181+899d6349.src.rpm
Repository   : AppStream
Summary      : The MySQL server and related files
URL          : http://www.mysql.com
License      : GPLv2 with exceptions and LGPLv2 and BSD
Description  : MySQL is a multi-user, multi-threaded SQL database server. MySQL is a
             : client/server implementation consisting of a server daemon (mysqld)
             : and many different client programs and libraries. This package contains
             : the MySQL server and some accompanying files and directories.
↑MySQLのバージョンをチェックします。
MySQL 8.0 なので、これを入れます。
# dnf install mysql-server.x86_64
Last metadata expiration check: 0:26:59 ago on Tue 05 May 2020 09:48:38 AM JST.
Dependencies resolved.
====================================================================================================================================================================
 Package                                        Architecture             Version                                                  Repository                   Size
====================================================================================================================================================================
Installing:
 mysql-server                                   x86_64                   8.0.17-3.module_el8.0.0+181+899d6349                     AppStream                    22 M
Installing dependencies:
 mariadb-connector-c-config                     noarch                   3.0.7-1.el8                                              AppStream                    13 k
 mecab                                          x86_64                   0.996-1.module_el8.0.0+41+ca30bab6.9                     AppStream                   397 k
 mysql                                          x86_64                   8.0.17-3.module_el8.0.0+181+899d6349                     AppStream                    11 M
 mysql-common                                   x86_64                   8.0.17-3.module_el8.0.0+181+899d6349                     AppStream                   143 k
 mysql-errmsg                                   x86_64                   8.0.17-3.module_el8.0.0+181+899d6349                     AppStream                   557 k
 protobuf-lite                                  x86_64                   3.5.0-7.el8                                              AppStream                   150 k
 policycoreutils-python-utils                   noarch                   2.9-3.el8_1.1                                            BaseOS                      250 k
Enabling module streams:
 mysql                                                                   8.0

Transaction Summary
====================================================================================================================================================================
Install  8 Packages

Total download size: 34 M
Installed size: 216 M


(略)

Installed:
  mysql-server-8.0.17-3.module_el8.0.0+181+899d6349.x86_64   mariadb-connector-c-config-3.0.7-1.el8.noarch
  mecab-0.996-1.module_el8.0.0+41+ca30bab6.9.x86_64          mysql-8.0.17-3.module_el8.0.0+181+899d6349.x86_64
  mysql-common-8.0.17-3.module_el8.0.0+181+899d6349.x86_64   mysql-errmsg-8.0.17-3.module_el8.0.0+181+899d6349.x86_64
  protobuf-lite-3.5.0-7.el8.x86_64                           policycoreutils-python-utils-2.9-3.el8_1.1.noarch

Complete!
# mysqld --version
/usr/libexec/mysqld  Ver 8.0.17 for Linux on x86_64 (Source distribution)
↑MySQL 8.0 が、インストールができました。
# systemctl start mysqld.service
# systemctl enable mysqld.service
Created symlink /etc/systemd/system/multi-user.target.wants/mysqld.service → /usr/lib/systemd/system/mysqld.service.
↑MySQL 8.0 を起動して、自動起動の設定をします。
MySQL 8.0 の初期設定をします。
# mysql_secure_installation

Securing the MySQL server deployment.

Connecting to MySQL using a blank password.

VALIDATE PASSWORD COMPONENT can be used to test passwords
and improve security. It checks the strength of password
and allows the users to set only those passwords which are
secure enough. Would you like to setup VALIDATE PASSWORD component?

Press y|Y for Yes, any other key for No: y

There are three levels of password validation policy:

LOW    Length >= 8
MEDIUM Length >= 8, numeric, mixed case, and special characters
STRONG Length >= 8, numeric, mixed case, special characters and dictionary file

Please enter 0 = LOW, 1 = MEDIUM and 2 = STRONG: 2
↑パスワードの強度を設定します。「強(Strong)」の「2」を選びます。
Please set the password for root here.

New password: xxxxxxxxx

Re-enter new password: xxxxxxxxx

Estimated strength of the password: 50
Do you wish to continue with the password provided?(Press y|Y for Yes, any other key for No) : n
↑「2」で、「Strong」を選びましたが、入力したパスワードは、強度が、50。
もう少し複雑にしたいので、「n」を入れます。
New password: xxxxxxxxx

Re-enter new password: xxxxxxxxx

Estimated strength of the password: 100
Do you wish to continue with the password provided?(Press y|Y for Yes, any other key for No) : y
↑今度は、強度が「100」になったので、よしとします。「y」を入力して、次に進みます。
Do you wish to continue with the password provided?(Press y|Y for Yes, any other key for No) : y
By default, a MySQL installation has an anonymous user,
allowing anyone to log into MySQL without having to have
a user account created for them. This is intended only for
testing, and to make the installation go a bit smoother.
You should remove them before moving into a production
environment.

Remove anonymous users? (Press y|Y for Yes, any other key for No) : y
Success.


Normally, root should only be allowed to connect from
'localhost'. This ensures that someone cannot guess at
the root password from the network.

Disallow root login remotely? (Press y|Y for Yes, any other key for No) : y
Success.

By default, MySQL comes with a database named 'test' that
anyone can access. This is also intended only for testing,
and should be removed before moving into a production
environment.


Remove test database and access to it? (Press y|Y for Yes, any other key for No) : y
 - Dropping test database...
Success.

 - Removing privileges on test database...
Success.

Reloading the privilege tables will ensure that all changes
made so far will take effect immediately.

Reload privilege tables now? (Press y|Y for Yes, any other key for No) : y
Success.

All done!
↑その他、設定をして完了させます。
初期のパスワードが、設定されていないだけで、そのほかは、4.7と同じです。
ワードプレス用、ユーザ、パスワード、DB名設定
ログインしてみます。
# mysql -u root -p
Enter password:
Welcome to the MySQL monitor.  Commands end with ; or \g.
Your MySQL connection id is 10
Server version: 8.0.17 Source distribution

Copyright (c) 2000, 2019, Oracle and/or its affiliates. All rights reserved.

Oracle is a registered trademark of Oracle Corporation and/or its
affiliates. Other names may be trademarks of their respective
owners.

Type 'help;' or '\h' for help. Type '\c' to clear the current input statement.

mysql> show databases;
+--------------------+
| Database           |
+--------------------+
| information_schema |
| mysql              |
| performance_schema |
| sys                |
+--------------------+
4 rows in set (0.00 sec)


mysql> show variables like 'character%';
+--------------------------+----------------------------+
| Variable_name            | Value                      |
+--------------------------+----------------------------+
| character_set_client     | utf8mb4                    |
| character_set_connection | utf8mb4                    |
| character_set_database   | utf8mb4                    |
| character_set_filesystem | binary                     |
| character_set_results    | utf8mb4                    |
| character_set_server     | utf8mb4                    |
| character_set_system     | utf8                       |
| character_sets_dir       | /usr/share/mysql/charsets/ |
+--------------------------+----------------------------+
8 rows in set (0.03 sec)
↑デフォルトのcharsetです。
mysql> insert into user (host,User,authentication_string,ssl_cipher,x509_issuer,x509_subject) values ('localhost','wp_user1',password('パスワード'),'','','');
ERROR 1064 (42000): You have an error in your SQL syntax; check the manual that corresponds to your MySQL server version for the right syntax to use near '('パスワード'),'','','')' at line 1
↑従来の「password」という関数は、エラーとなります。
mysql> insert into user (host,User,authentication_string,ssl_cipher,x509_issuer,x509_subject) values ('localhost','wp_user1','','','','');
Query OK, 1 row affected (0.00 sec)

mysql> flush privileges;
Query OK, 0 rows affected (0.00 sec)

mysql> ALTER USER 'wp_user1'@'localhost' IDENTIFIED BY 'パスワード';
Query OK, 0 rows affected (0.01 sec)

mysql> flush privileges;
Query OK, 0 rows affected (0.00 sec)
↑と、2段階で、パスワードを設定します。
mysql> insert into db (host,db,user) values ('localhost','wp_db','wp_user1');
Query OK, 1 row affected (0.01 sec)

mysql> update db set Select_priv='Y',Insert_priv='Y',Update_priv='Y',Delete_priv='Y',Create_priv='Y',Drop_priv='Y',Grant_priv='Y',References_priv='Y',Index_priv='Y',Alter_priv='Y',Create_tmp_table_priv='Y',Lock_tables_priv='Y',Create_view_priv='Y',Show_view_priv='Y',Create_routine_priv='Y',Alter_routine_priv='Y',Execute_priv='Y',Event_priv='Y',Trigger_priv='Y' where db='wp_db';
Query OK, 1 row affected (0.00 sec)
Rows matched: 1  Changed: 1  Warnings: 0

mysql> create database wp_db;
Query OK, 1 row affected (0.01 sec)

mysql> flush privileges;
Query OK, 0 rows affected (0.00 sec)
↑DB名などを設定します。
httpd (apache)
# dnf search httpd
Last metadata expiration check: 0:15:33 ago on Tue 05 May 2020 09:26:14 PM JST.
=================================================================== Name Exactly Matched: httpd ====================================================================
httpd.x86_64 : Apache HTTP Server
================================================================== Name & Summary Matched: httpd ===================================================================


# dnf info httpd.x86_64
Last metadata expiration check: 0:15:49 ago on Tue 05 May 2020 09:26:14 PM JST.
Available Packages
Name         : httpd
Version      : 2.4.37
Release      : 16.module_el8.1.0+256+ae790463
Architecture : x86_64
Size         : 1.7 M
Source       : httpd-2.4.37-16.module_el8.1.0+256+ae790463.src.rpm
Repository   : AppStream
Summary      : Apache HTTP Server
URL          : https://httpd.apache.org/
License      : ASL 2.0
Description  : The Apache HTTP Server is a powerful, efficient, and extensible
↑httpdのバージョンを調べます。
# dnf install httpd.x86_64


Installed:
  httpd-2.4.37-16.module_el8.1.0+256+ae790463.x86_64             apr-util-bdb-1.6.1-6.el8.x86_64
  apr-util-openssl-1.6.1-6.el8.x86_64                            apr-1.6.3-9.el8.x86_64
  apr-util-1.6.1-6.el8.x86_64                                    centos-logos-httpd-80.5-2.el8.noarch
  httpd-filesystem-2.4.37-16.module_el8.1.0+256+ae790463.noarch  httpd-tools-2.4.37-16.module_el8.1.0+256+ae790463.x86_64
  mod_http2-1.11.3-3.module_el8.1.0+213+acce2796.x86_64

Complete!

# httpd -version
Server version: Apache/2.4.37 (centos)
Server built:   Dec 23 2019 20:45:34
↑httpd (apache) 2.4.37が入りました。
vi /etc/httpd/conf/httpd.conf

<Directory "/var/www/html">
のセクション
Options Indexes FollowSymLinks
 ↓
Options All -Indexes +SymLinksIfOwnerMatch -FollowSymLinks

AllowOverride None
 ↓
AllowOverride AuthConfig FileInfo Indexes Limit Options=MultiViews,Ind
↑と、変更をします。
# systemctl start httpd.service
# systemctl status httpd.service
# systemctl enable httpd.service
↑httpd(apache)のサービスを起動して、自動起動も設定します。
# firewall-cmd --add-service=http --zone=public --permanent
success
# firewall-cmd --add-service=https --zone=public --permanent
success
# firewall-cmd --reload
success
↑firewallで、80番と443番ポートを空けます。
PHP 7.4
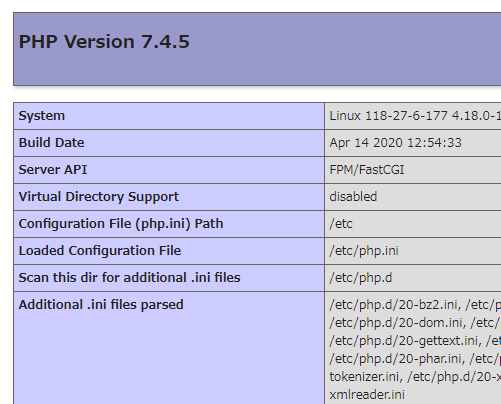
# yum install https://dl.fedoraproject.org/pub/epel/epel-release-latest-8.noarch.rpm

# yum install https://rpms.remirepo.net/enterprise/remi-release-8.rpm


# dnf install dnf-utils

# dnf module install php:remi-7.4


# php -v
PHP 7.4.5 (cli) (built: Apr 14 2020 12:54:33) ( NTS )
Copyright (c) The PHP Group
Zend Engine v3.4.0, Copyright (c) Zend Technologies
↑php 7.4 が入りました。
# vi /etc/httpd/conf/httpd.conf

AddType application/x-httpd-php .php
↑phpとhttpd(apache)を関連付けます。
# systemctl restart httpd.service
↑phpが認識されました。
ワードプレス
# cd /var/www/
# wget https://ja.wordpress.org/latest-ja.tar.gz
# tar xzvf latest-ja.tar.gz
# mv html/ html.back
# mv wordpress/ html
# cd html
# cp -a wp-config-sample.php wp-config.php
↑コンテンツをダウンロードして、設定ファイルをコピーします。
# vi wp-config.php

define('DB_NAME', 'database_name_here');
define('DB_USER', 'username_here');
define('DB_PASSWORD', 'password_here');
↑MySQLで設定した情報を登録します。
# vi wp-config.php

define('AUTH_KEY',         'put your unique phrase here');
define('SECURE_AUTH_KEY',  'put your unique phrase here');
define('LOGGED_IN_KEY',    'put your unique phrase here');
define('NONCE_KEY',        'put your unique phrase here');
define('AUTH_SALT',        'put your unique phrase here');
define('SECURE_AUTH_SALT', 'put your unique phrase here');
define('LOGGED_IN_SALT',   'put your unique phrase here');
define('NONCE_SALT',       'put your unique phrase here');
上記を
https://api.wordpress.org/secret-key/1.1/salt/
で、表示されるものに入れ替えます。
# vi /etc/httpd/conf.d/virtual.conf

<VirtualHost XXX.XXX.XXX.XXX:80>
ServerName (ドメイン名、FQDN)
DocumentRoot /var/www/html

</VirtualHost>
↑グローバルIPと、FQDNを設定します。
# systemctl restart httpd.service
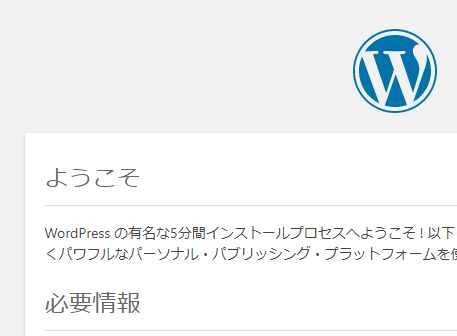
http://(ドメイン名、FQDN)/
で、アクセスしてみます。

↑「お使いのサーバーの PHP では WordPress に必要な MySQL 拡張を利用できないようです」とエラーがでました・・・
# dnf install httpd mod_ssl
# dnf install php php-xmlrpc php-gd php-pdo php-mysqlnd php-pecl-mysql php-pecl-zip php-pecl-apc
# systemctl restart httpd.service
↑うまく行きました。
SSL
wget https://dl.eff.org/certbot-auto
chmod 755 certbot-auto
./certbot-auto certonly --non-interactive --agree-tos --webroot -w /var/www/html -d (ドメイン名、FQDN)--email (連絡先メールアドレス)
IMPORTANT NOTES:
 - Congratulations! Your certificate and chain have been saved at:
   /etc/letsencrypt/live/(ドメイン名、FQDN)/fullchain.pem
   Your key file has been saved at:
   /etc/letsencrypt/live/(ドメイン名、FQDN)/privkey.pem
   Your cert will expire on 2020-08-03. To obtain a new or tweaked
   version of this certificate in the future, simply run certbot-auto
   again. To non-interactively renew *all* of your certificates, run
   "certbot-auto renew"
↑SSLが発行されました。
vi /etc/httpd/conf.d/ssl.conf


<VirtualHost _default_:443>

---
</VirtualHost>
↑上記部分を削除
vi /etc/httpd/conf.d/ssl.conf

<VirtualHost XXX.XXX.XXX.XXX:443>
ServerName (ドメイン名、FQDN)
DocumentRoot /var/www/html

SSLProtocol all -SSLv2 -SSLv3

SSLEngine on
SSLCertificateFile /etc/letsencrypt/live/(ドメイン名、FQDN)/fullchain.pem
SSLCertificateChainFile /etc/letsencrypt/live/(ドメイン名、FQDN)/fullchain.pem
SSLCertificateKeyFile /etc/letsencrypt/live/(ドメイン名、FQDN)/privkey.pem
</VirtualHost>
と設定をします。
# systemctl restart httpd.service
FTPサーバー、proftpd
Proftpd for SSL/TSL ,CentOS7
の通り、設定をします。CentOS8でも、同じ方法で、インストールができます。
ワードプレス、FTP用ユーザ登録
# useradd -d /var/www/ -g 100 (FTPユーザ名)
# passwd (FTPユーザ名)
# chown -R (FTPユーザ名).100 /var/www/
↑ワードプレス用のftpを設定します。
ワードプレス、SSL
いろいろな方法があるかと思いますが、
プラグイン、Really Simple SSL での設定方法を・・・
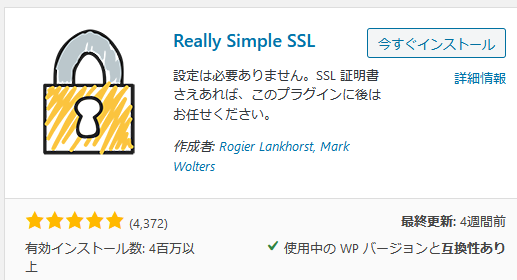
Really Simple SSLを検索して、インストールします。

↑SSLが有効になりました。
CentOS8、ワードプレス、結論
ワードプレスをインストールする分には、CentOS7と同じ感覚でできます。
脆弱性が少ないであろう、新しいバージョンのほうがいいですね。