CentOS7に、Web系を構築する手順のメモです。
基本的に、ソースからインストールをします。
ConoHa VPSのCentOS7.6に入れてみます。
ConoHa VPSは、高速SSDディスクということもあり、高パフォーマンススが期待できます。
また、高負荷になったら、CPUをスケールアップすることができるので、低価格で柔軟性が高いサーバーです。
関連記事:高速サーバー【ConoHa VPS】
MySQL 5.7
# vi /etc/passwd
mysql:x:502:502::/home/mysql:/bin/bash
# vi /etc/group
mysql:x:502:
↑IDとグループを設定します。
# yum -y install cmake
# yum -y install ncurses-devel
↑インストールに必要なソフトを入れます。
# wget https://dev.mysql.com/get/Downloads/MySQL-5.7/mysql-5.7.25.tar.gz
↑wgetで、2019年3月末での最新版をダウンロードします。
# tar xzvf mysql-5.7.25.tar.gz
# cd mysql-5.7.25/
# cmake -DCMAKE_INSTALL_PREFIX=/usr/local/mysql-5.7.25 -DDEFAULT_CHARSET=utf8 -DDEFAULT_COLLATION=utf8_general_ci -DENABLED_LOCAL_INFILE=true -DWITH_INNOBASE_STORAGE_ENGINE=1 -DWITH_EXTRA_CHARSETS=all -DWITH_INNODB_MEMCACHED=ON -DDOWNLOAD_BOOST=1 -DWITH_BOOST=/tmp/boost
# make
# make install
↑ MySQL 5.7をインストールをします。
# cd /usr/local
# ln -s mysql-5.7.25 mysql57
↑「/usr/local/mysql57」を基本として、リンクを張ります。
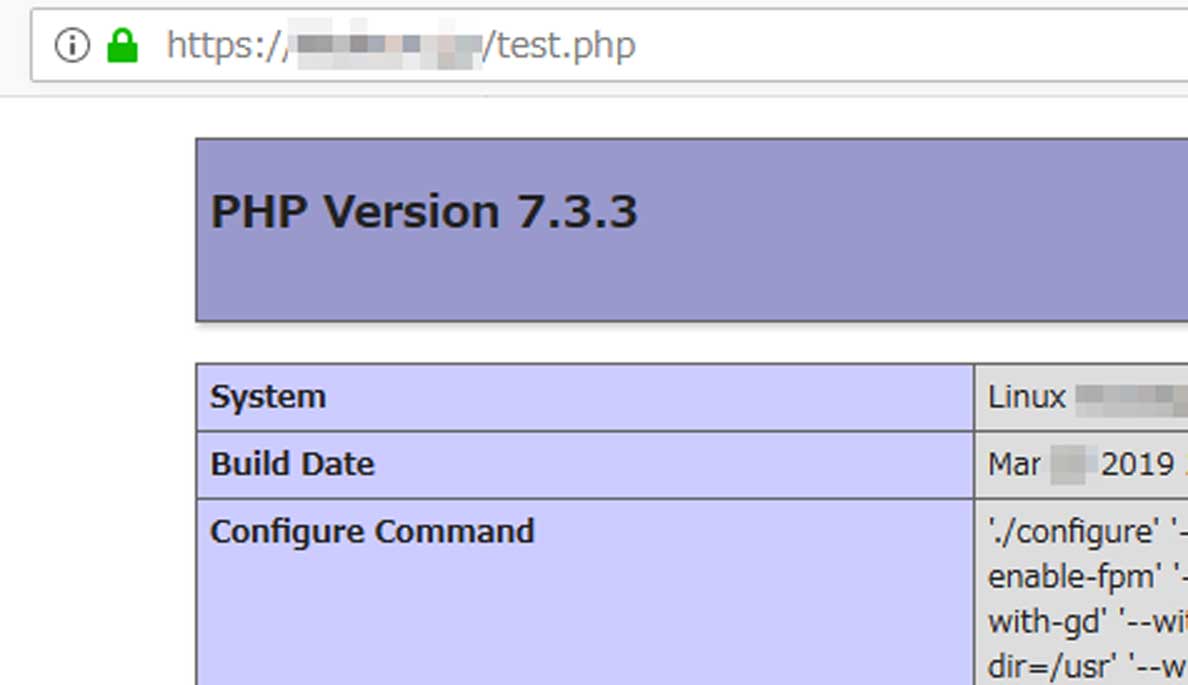
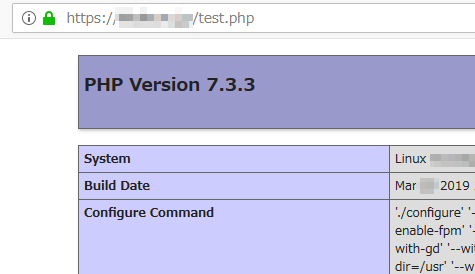
PHP 7.3 (PHP-FPM)
php7.3 インストール
# vi /etc/passwd
nginx:x:7003:7003::/home/nginx:/bin/nologin
# vi /etc/group
nginx:x:7003:
↑先に、nginx用にIDとグループを設定しておきます。
番号は違っても大丈夫(qmailと違い・・・笑)
# tar xzvf php-7.3.3.tar.gz
# cd php-7.3.3
# ./configure -with-mysqli=/usr/local/mysql57/ --with-pdo-mysql --with-mysqli --enable-pcntl --enable-fpm --with-fpm-user=nginx --with-fpm-group=nginx --enable-mbstring --enable-ftp --with-gd --with-jpeg-dir --with-png-dir --with-zlib --enable-zip --with-libxml-dir=/usr --with-freetype-dir=/usr/local/lib --enable-gd-jis-conv --enable-cgi --with-curl --enable-opcache
↑先に入れた「MySQL」のインストール先を「-with-mysqli=/usr/local/mysql57/」として設定します。
php 7.4.4のバージョンは、php 7.4.x ソースインストール を参考にしてください(2020/04/14)。
その他、Nginx用、PHP-FPM用の設定を指定します。
checking libxml2 install dir... /usr
checking for xml2-config path...
checking for pkg-config... /usr/bin/pkg-config
configure: error: libxml2 not found. Please check your libxml2 installation.
↑libxml2 がないとエラーに・・・
# yum install libxml2-devel
↑インストールをして、再度、configureをします。
checking for cURL support... yes
checking for pkg-config... /usr/bin/pkg-config
checking for libcurl.pc... using default path
checking for cURL 7.15.5 or greater... configure: error: cURL version 7.15.5 or later is required to compile php with cURL support
↑ CURLのエラーとなり・・・
# yum install curl curl-devel
↑ 関係ソフトを入れます。
checking for FreeType 2... /usr/local/lib
checking whether to enable JIS-mapped Japanese font support in GD... yes
If configure fails try --with-webp-dir=<DIR>
configure: error: jpeglib.h not found.
↑「jpeg」関係のライブラリがない・・・
yum install libjpeg-devel
↑ libjpeg関係のソフトを入れます。
checking whether to enable JIS-mapped Japanese font support in GD... yes
If configure fails try --with-webp-dir=<DIR>
checking for jpeg_read_header in -ljpeg... yes
configure: error: png.h not found.
↑ png関係のライブラリがないと・・・
# yum install libpng-devel
↑ png関係の開発ツールを入れます。
hecking for jpeg_read_header in -ljpeg... yes
checking for png_write_image in -lpng... yes
If configure fails try --with-xpm-dir=<DIR>
configure: error: freetype-config not found.
↑ フォント関係のファイルがないというエラー・・・
# yum install freetype-devel
↑ freetype関係をインストールします。
checking for the location of zlib... /usr
checking for pkg-config... (cached) /usr/bin/pkg-config
checking for libzip... not found
configure: error: Please reinstall the libzip distribution
↑ libzip関係がないよ!というエラー
# yum install libzip-devel
checking for the location of zlib... /usr
checking for pkg-config... (cached) /usr/bin/pkg-config
checking for libzip... configure: error: system libzip must be upgraded to version >= 0.11
↑ libzipを入れようとするが・・・「0.11以上にしてくれ!」と・・・
入ったのは、「0.10.1」というバージョン。
yumではなく、
https://libzip.org/news/release-0.11.html
から該当バージョンをダウンロードして、インストールしてみます。
#yum remove libzip
と、一度、削除します。

# tar xzvf libzip-0.11.tar.gz
# cd libzip-0.11/
# ./configure
# make
# make install
これで、「configure」は、うまくいきました!
しかし、
In file included from /root/src/php-7.3.3/ext/zip/php_zip.h:31:0,
                 from /root/src/php-7.3.3/ext/zip/php_zip.c:36:
/usr/local/include/zip.h:53:21: fatal error: zipconf.h: No such file or directory
 #include <zipconf.h>
                     ^
compilation terminated.
make: *** [ext/zip/php_zip.lo] Error 1
↑ と、「make」の途中で、エラーになってしまいます・・・
結局、
./configure -with-mysqli=/usr/local/mysql57/ --with-pdo-mysql --with-mysqli --enable-pcntl --enable-fpm --with-fpm-user=nginx --with-fpm-group=nginx --enable-mbstring --enable-ftp --with-gd --with-jpeg-dir --with-png-dir --with-zlib --enable-zip --without-libzip --with-libxml-dir=/usr --with-freetype-dir=/usr/local/lib --enable-gd-jis-conv --enable-cgi --with-curl --enable-opcache
↑ と、「–without-libzip」を付加して、configure。
これで、
# make
# make install
↑ と、うまくいきました!
php 7.3 起動
今回、init形式で起動させます
# cp sapi/fpm/init.d.php-fpm /etc/rc.d/init.d/php-fpm
# chmod 755 /etc/rc.d/init.d/php-fpm
# cd /usr/local/etc/
# cp php-fpm.conf.default php-fpm.conf
# vi php-fpm.conf
---------------------------------
#pid = run/php-fpm.pid
↓
pid = run/php-fpm.pid

include=NONE/etc/php-fpm.d/*.conf
↓
include=/usr/local/etc/php-fpm.d/*.conf
-----------------------------------
# cd /usr/local/etc/php-fpm.d/
# cp www.conf.default www.conf

(www.confの設定確認)
#/etc/rc.d/init.d/php-fpm start
↑起動をさせます。
php.iniのコピー(2019/04/14 追記)
php.iniは、テンプレート的なものが2つあります。
(ソースディレクトリ)/php-7.3.3/php.ini-development
(ソースディレクトリ)/php-7.3.3/php.ini-production
開発用と、本番用が用意されています。どちらかのファイルを、「/usr/local/lib」以下に「php.ini」ファイルとして、コピーします。
・error_reporting
エラーのレベルを設定する。開発時は、些細なものもエラーとするが、本番時は、致命的なものだけ、エラーとする
・display_errors
画面上にエラーを表示させるかどうか。開発時は、表示。本番時は非表示とする。
・display_startup_errors
PHP起動時のエラーを表示する。開発時は、表示。本番時は非表示とする。
・zend.assertions
phpの簡易テストをプログラムレベルで行い、本番時は、無視するような運用になります。
・mysqlnd.collect_memory_statistics
メモリの統計情報を出すかどうか。開発時は、On。
CentOS7でのsystemctrlでの起動 (2019/04/16 追記)
# vi /etc/systemd/system/phpfpm.service
--------------------------------------------
[Unit]
Description=PHP fpm
After=network.target

[Service]
Type=simple
RemainAfterExit=yes
ExecStart=/etc/rc.d/init.d/php-fpm start
ExecStop=/etc/rc.d/init.d/php-fpm stop

[Install]
WantedBy=multi-user.target
--------------------------------------------
↑systemctrl用の記述をします。
# systemctl start phpfpm
# systemctl enable phpfpm
↑起動させて、自動起動も有効にします。
Nginx 1.14
configure.log
過去、違うOSに入れた、Nginxのconfigureの設定を見たい場合、違うソフトでは、configure.logなどで保存されている事が多いですが、nginxでは、configure.logがありません。
しかし、実行ファイルがあれば、インストールしたパラメーターを確認することができます。
/usr/local/nginx/sbin/nginx -V
でチェックができます。
Nginx 1.14 インストール
# tar xzvf nginx-1.14.2.tar.gz
# cd nginx-1.14.2
# ./configure --prefix=/usr/local/nginx --user=nginx --group=nginx --with-http_ssl_module --with-http_v2_module --with-http_gzip_static_module --with-http_image_filter_module --with-http_stub_status_module --with-http_realip_module --with-http_addition_module --with-http_sub_module
↑ configureをします。
checking for GD library ... not found
checking for GD library in /usr/local/ ... not found
checking for GD library in /usr/pkg/ ... not found
checking for GD library in /opt/local/ ... not found

./configure: error: the HTTP image filter module requires the GD library.
You can either do not enable the module or install the libraries.
↑ gd関係のライブラリーがないとエラーに・・・
# yum install gd gd-devel
↑ gd関係を入れて、再度、configureをします。
# ./configure
# make
# make install
Nginxで、80番ポートを設定
user  nginx;
worker_processes  auto;
worker_rlimit_nofile 1024;
worker_cpu_affinity auto;
error_log /var/log/nginx/error.log;
pid /run/nginx.pid;


    gzip              on;
    gzip_http_version 1.0;
    gzip_types        text/plain
                      text/xml
                      text/css
                      application/xml
                      application/xhtml+xml
                      application/rss+xml
                      application/atom_xml
                      application/javascript
                      application/x-javascript
                      application/x-httpd-php;
    gzip_disable      "MSIE [1-6]\.";
    gzip_disable      "Mozilla/4";
    gzip_comp_level   1;
    gzip_proxied      any;
    gzip_vary         on;
    gzip_buffers      4 8k;
    gzip_min_length   1100;
↑ /usr/local/nginx/conf/nginx.conf の設定の一部
Nginx起動
vi /usr/lib/systemd/system/nginx.service
[Unit]
Description=The nginx HTTP and reverse proxy server
After=network.target remote-fs.target nss-lookup.target

[Service]
Type=forking
PIDFile=/run/nginx.pid
# Nginx will fail to start if /run/nginx.pid already exists but has the wrong
# SELinux context. This might happen when running `nginx -t` from the cmdline.
# https://bugzilla.redhat.com/show_bug.cgi?id=1268621
ExecStartPre=/usr/bin/rm -f /run/nginx.pid
ExecStartPre=/usr/local/nginx/sbin/nginx -t
ExecStart=/usr/local/nginx/sbin/nginx -c /usr/local/nginx/conf/nginx.conf
ExecReload=/bin/kill -s HUP $MAINPID
KillSignal=SIGQUIT
TimeoutStopSec=5
KillMode=process
PrivateTmp=true

[Install]
WantedBy=multi-user.target
# systemctl start nginx

# firewall-cmd --permanent --add-service=http
# firewall-cmd --permanent --add-service=https
↑Nginxのサービスを起動して、httpとhttpsのポートを開けます。
これで、80番ポートのhttpが起動されました。
SSL (Let’s Encrypt)
# yum install certbot
# wget https://dl.eff.org/certbot-auto
↑関係ファイルをインストールします。
# ./certbot-auto certonly --webroot -w (webルートのフルパス) -d (SSLドメインFQDN) --renew-by-default
Saving debug log to /var/log/letsencrypt/letsencrypt.log
(略)

IMPORTANT NOTES:
 - The following errors were reported by the server:

   Domain: (ドメイン)
   Type:   connection
   Detail: Fetching
   http://(SSLドメインFQDN)/.well-known/acme-challenge/(英数字):
   Error getting validation data

   (略)
↑非SSLの80番ポートにアクセスできないよ!
というエラー。
80番ポートにアクセスできるようにして、
再度、「certbot」を起動させます。
# ./certbot-auto certonly --webroot -w (webルートのフルパス)-d (SSLドメインFQDN) --renew-by-default
Saving debug log to /var/log/letsencrypt/letsencrypt.log
(略)

IMPORTANT NOTES:
 - Congratulations! Your certificate and chain have been saved at:
   /etc/letsencrypt/live/(SSLドメインFQDN)fullchain.pem
   Your key file has been saved at:
   /etc/letsencrypt/live/(SSLドメインFQDN)/privkey.pem

   (略)
↑インストールができました。
        server {
                listen       443 ssl http2 default_server;
                server_name (SSLドメインFQDN);
                ssl_certificate     /etc/letsencrypt/live/(SSLドメインFQDN)fullchain.pem;
                ssl_certificate_key /etc/letsencrypt/live/(SSLドメインFQDN)/privkey.pem;
                ssl_trusted_certificate /etc/letsencrypt/live/(SSLドメインFQDN)/fullchain.pem;

                ssl_session_timeout 1d;
                ssl_session_cache shared:SSL:50m;
                ssl_session_tickets off;
                ssl_dhparam /usr/local/nginx/ssl/dhparam.pem;
                ssl_protocols TLSv1 TLSv1.1 TLSv1.2;
                ssl_ciphers 'ECDHE-ECDSA-CHACHA20-POLY1305:ECDHE-RSA-CHACHA20-POLY1305:ECDHE-ECDSA-AES128-GCM-SHA256:ECDHE-RSA-AES128-GCM-SHA256:ECDHE-ECDSA-AES256-GCM-SHA384:ECDHE-RSA-AES256-GCM-SHA384:DHE-RSA-AES128-GCM-SHA256:DHE-RSA-AES256-GCM-SHA384:ECDHE-ECDSA-AES128-SHA256:ECDHE-RSA-AES128-SHA256:ECDHE-ECDSA-AES128-SHA:ECDHE-RSA-AES256-SHA384:ECDHE-RSA-AES128-SHA:ECDHE-ECDSA-AES256-SHA384:ECDHE-ECDSA-AES256-SHA:ECDHE-RSA-AES256-SHA:DHE-RSA-AES128-SHA256:DHE-RSA-AES128-SHA:DHE-RSA-AES256-SHA256:DHE-RSA-AES256-SHA:ECDHE-ECDSA-DES-CBC3-SHA:ECDHE-RSA-DES-CBC3-SHA:EDH-RSA-DES-CBC3-SHA:AES128-GCM-SHA256:AES256-GCM-SHA384:AES128-SHA256:AES256-SHA256:AES128-SHA:AES256-SHA:DES-CBC3-SHA:!DSS';
                ssl_prefer_server_ciphers on;
                add_header Strict-Transport-Security max-age=15768000;
                ssl_stapling on;
                ssl_stapling_verify on;
↑ nginxの設定(一部)
Nginxを再起動させます。
↑起動できました!