ConohaVPS![]() で、Rocky Linux 9(RHEL系)で、初期設定から、Nginxのproxy cacheまでの流れを一気に!
で、Rocky Linux 9(RHEL系)で、初期設定から、Nginxのproxy cacheまでの流れを一気に!
Rocky Linux 初期設定
# cat /etc/os-release
NAME="Rocky Linux"
VERSION="9.1 (Blue Onyx)"
(略)
↑初期設定時です。RockyLinux 9.1 です。
# getenforce
Disabled
↑ConohaVPSでは、SeLinuxが無効になっています。
# dnf update
Extra Packages for Enterprise Linux 9 - x86_64                                                         17 MB/s |  15 MB     00:00
Rocky Linux 9 - BaseOS                                                                                1.6 MB/s | 1.8 MB     00:01
Rocky Linux 9 - AppStream                                                                              11 MB/s | 6.8 MB     00:00
Rocky Linux 9 - Extras                                                                                9.6 kB/s | 8.7 kB     00:00
Dependencies resolved.
======================================================================================================================================
 Package                                   Architecture        Version                                   Repository              Size
======================================================================================================================================
Installing:
 kernel                                    x86_64              5.14.0-162.23.1.el9_1                     baseos                 1.9 M
Upgrading:
 NetworkManager                            x86_64              1:1.40.0-2.el9_1                          baseos                 2.1 M
 NetworkManager-libnm                      x86_64              1:1.40.0-2.el9_1                          baseos                 1.7 M

(略)

Installed:
  fail2ban-selinux-1.0.2-3.el9.noarch                                grub2-tools-efi-1:2.06-46.el9_1.5.rocky.0.2.x86_64
  grub2-tools-extra-1:2.06-46.el9_1.5.rocky.0.2.x86_64               kernel-5.14.0-162.23.1.el9_1.x86_64
  kernel-core-5.14.0-162.23.1.el9_1.x86_64                           kernel-modules-5.14.0-162.23.1.el9_1.x86_64
  policycoreutils-python-utils-3.4-4.el9.noarch                      python3-file-magic-5.39-10.el9.noarch

Complete!
↑updateコマンドは、centos8系と同じ、dnfです。
アップデートされました。
MySQL server 8.0
# dnf info mysql-server

Available Packages
Name         : mysql-server
Version      : 8.0.30
Release      : 3.el9_0
Architecture : x86_64
Size         : 17 M
Source       : mysql-8.0.30-3.el9_0.src.rpm
Repository   : appstream
Summary      : The MySQL server and related files
URL          : http://www.mysql.com
License      : GPLv2 with exceptions and LGPLv2 and BSD
Description  : MySQL is a multi-user, multi-threaded SQL database server. MySQL is a
             : client/server implementation consisting of a server daemon (mysqld)
             : and many different client programs and libraries. This package contains
             : the MySQL server and some accompanying files and directories.
↑インストール出来るのは、MySQL 8.0.30 です。
現時点での最新版は、8.0.33です。
# dnf install mysql-server

Dependencies resolved.
=========================================================================================================================================
 Package                                     Architecture            Version                            Repository                  Size
=========================================================================================================================================
Installing:
 mysql-server                                x86_64                  8.0.30-3.el9_0                     appstream                   17 M
Installing dependencies:
 mariadb-connector-c-config                  noarch                  3.2.6-1.el9_0                      appstream                  9.8 k
 mecab                                       x86_64                  0.996-3.el9.3                      appstream                  347 k
 mysql                                       x86_64                  8.0.30-3.el9_0                     appstream                  2.8 M
 mysql-common                                x86_64                  8.0.30-3.el9_0                     appstream                   70 k
 mysql-errmsg                                x86_64                  8.0.30-3.el9_0                     appstream                  476 k
 mysql-selinux                               noarch                  1.0.5-1.el9_0                      appstream                   35 k


↑「mysql-server」を指定すれば、「mysql」「mysql-common」なども、自動的にインストールされます。

(略)

Installed:
  mariadb-connector-c-config-3.2.6-1.el9_0.noarch mecab-0.996-3.el9.3.x86_64                   mysql-8.0.30-3.el9_0.x86_64
  mysql-common-8.0.30-3.el9_0.x86_64              mysql-errmsg-8.0.30-3.el9_0.x86_64           mysql-selinux-1.0.5-1.el9_0.noarch
  mysql-server-8.0.30-3.el9_0.x86_64              perl-AutoLoader-5.74-479.el9.noarch          perl-B-1.80-479.el9.x86_64

(略)
↑mysql-server 8.0.30がインストールされました
# systemctl status mysqld.service
● mysqld.service - MySQL 8.0 database server
     Loaded: loaded (/usr/lib/systemd/system/mysqld.service; disabled; vendor preset: disabled)
     Active: active (running) since Sun 2023-XX-XX XX:XX:XX JST; 7s ago
    Process: 1115 ExecStartPre=/usr/libexec/mysql-check-socket (code=exited, status=0/SUCCESS)
    Process: 1137 ExecStartPre=/usr/libexec/mysql-prepare-db-dir mysqld.service (code=exited, status=0/SUCCESS)
   Main PID: 1219 (mysqld)
     Status: "Server is operational"
      Tasks: 39 (limit: 12316)
     Memory: 517.3M
        CPU: 4.751s
     CGroup: /system.slice/mysqld.service
             └─1219 /usr/libexec/mysqld --basedir=/usr


# systemctl enable mysqld.service
Created symlink /etc/systemd/system/multi-user.target.wants/mysqld.service → /usr/lib/systemd/system/mysqld.service.
↑mysqldの起動を確認して、再起動後も、自動起動するようにします。
↓初期設定プログラムを稼働させます。
# mysql_secure_installation

Securing the MySQL server deployment.

Connecting to MySQL using a blank password.

VALIDATE PASSWORD COMPONENT can be used to test passwords
and improve security. It checks the strength of password
and allows the users to set only those passwords which are
secure enough. Would you like to setup VALIDATE PASSWORD component?

Press y|Y for Yes, any other key for No: 【y】

There are three levels of password validation policy:

LOW    Length >= 8
MEDIUM Length >= 8, numeric, mixed case, and special characters
STRONG Length >= 8, numeric, mixed case, special characters and dictionary                  file

Please enter 0 = LOW, 1 = MEDIUM and 2 = STRONG: 0
Please set the password for root here.

New password: 【複雑なパスワード】


Re-enter new password: 【複雑なパスワード】

Estimated strength of the password: 100
Do you wish to continue with the password provided?(Press y|Y for Yes, any other key for No) : 【y】
By default, a MySQL installation has an anonymous user,
allowing anyone to log into MySQL without having to have
a user account created for them. This is intended only for
testing, and to make the installation go a bit smoother.
You should remove them before moving into a production
environment.

Remove anonymous users? (Press y|Y for Yes, any other key for No) : 【y】
Success.


Normally, root should only be allowed to connect from
'localhost'. This ensures that someone cannot guess at
the root password from the network.

Disallow root login remotely? (Press y|Y for Yes, any other key for No) : 【y】
Success.

By default, MySQL comes with a database named 'test' that
anyone can access. This is also intended only for testing,
and should be removed before moving into a production
environment.


Remove test database and access to it? (Press y|Y for Yes, any other key for No) : 【y】
 - Dropping test database...
Success.

 - Removing privileges on test database...
Success.

Reloading the privilege tables will ensure that all changes
made so far will take effect immediately.

Reload privilege tables now? (Press y|Y for Yes, any other key for No) :【y】
Success.

All done!
↑完了
のエラーは、出なかったです。
php-fpm 8.1
# dnf module install php:8.1

Dependencies resolved.
=========================================================================================================================================
 Package                        Architecture         Version                                               Repository               Size
=========================================================================================================================================
Installing group/module packages:
 php-cli                        x86_64               8.1.8-1.module+el9.1.0+13171+4883e0c8                 appstream               3.5 M
 php-common                     x86_64               8.1.8-1.module+el9.1.0+13171+4883e0c8                 appstream               667 k
 php-fpm                        x86_64               8.1.8-1.module+el9.1.0+13171+4883e0c8                 appstream               1.8 M
 php-mbstring                   x86_64               8.1.8-1.module+el9.1.0+13171+4883e0c8                 appstream               475 k
 php-xml                        x86_64               8.1.8-1.module+el9.1.0+13171+4883e0c8                 appstream               142 k
Installing dependencies:
 httpd-filesystem               noarch               2.4.53-7.el9_1.5                                      appstream                14 k
 libxslt                        x86_64               1.1.34-9.el9                                          appstream               240 k
 nginx-filesystem               noarch               1:1.20.1-13.el9                                       appstream                11 k
 oniguruma                      x86_64               6.9.6-1.el9.5                                         appstream               217 k
Installing module profiles:
 php/common
Enabling module streams:
 php                                                 8.1

Transaction Summary
=========================================================================================================================================
Install  9 Packages

Total download size: 7.0 M
Installed size: 35 M
Is this ok [y/N]: y

(略)

Installed:
  httpd-filesystem-2.4.53-7.el9_1.5.noarch                         libxslt-1.1.34-9.el9.x86_64
  nginx-filesystem-1:1.20.1-13.el9.noarch                          oniguruma-6.9.6-1.el9.5.x86_64
  php-cli-8.1.8-1.module+el9.1.0+13171+4883e0c8.x86_64             php-common-8.1.8-1.module+el9.1.0+13171+4883e0c8.x86_64
  php-fpm-8.1.8-1.module+el9.1.0+13171+4883e0c8.x86_64             php-mbstring-8.1.8-1.module+el9.1.0+13171+4883e0c8.x86_64
  php-xml-8.1.8-1.module+el9.1.0+13171+4883e0c8.x86_64

Complete!
# php -v
PHP 8.1.8 (cli) (built: Jul  5 2022 21:55:55) (NTS gcc x86_64)
Copyright (c) The PHP Group
Zend Engine v4.1.8, Copyright (c) Zend Technologies

# php-fpm -v
PHP 8.1.8 (fpm-fcgi) (built: Jul  5 2022 21:55:55)
Copyright (c) The PHP Group
Zend Engine v4.1.8, Copyright (c) Zend Technologies
↑php 8.1が入りました。
# systemctl start php-fpm
# systemctl status php-fpm
● php-fpm.service - The PHP FastCGI Process Manager
     Loaded: loaded (/usr/lib/systemd/system/php-fpm.service; disabled; vendor preset: disabled)
     Active: active (running) since Sun 2023-XX-XX XX:XX:XX JST; 2s ago
   Main PID: 1763 (php-fpm)
     Status: "Ready to handle connections"
      Tasks: 6 (limit: 12316)
     Memory: 9.3M
        CPU: 76ms
     CGroup: /system.slice/php-fpm.service
             ├─1763 "php-fpm: master process (/etc/php-fpm.conf)"
             ├─1764 "php-fpm: pool www"
             ├─1765 "php-fpm: pool www"
             ├─1766 "php-fpm: pool www"
             ├─1767 "php-fpm: pool www"
             └─1768 "php-fpm: pool www"


# systemctl enable php-fpm
Created symlink /etc/systemd/system/multi-user.target.wants/php-fpm.service → /usr/lib/systemd/system/php-fpm.service.
↑php-fpm を起動させて、自動起動の設定をします。
Nginx
# dnf info nginx

Available Packages
Name         : nginx
Epoch        : 1
Version      : 1.20.1
Release      : 13.el9
Architecture : x86_64
Size         : 38 k
Source       : nginx-1.20.1-13.el9.src.rpm
Repository   : appstream
Summary      : A high performance web server and reverse proxy server
URL          : https://nginx.org
License      : BSD
Description  : Nginx is a web server and a reverse proxy server for HTTP, SMTP, POP3 and
             : IMAP protocols, with a strong focus on high concurrency, performance and low
             : memory usage.
↑標準で入るのは、少し古い(version 1.20.1)ので、新しいのをインストール

↑上記に手順が書いてあり、この通りに行います。
# vi /etc/yum.repos.d/nginx.repo

[nginx-stable]
name=nginx stable repo
baseurl=http://nginx.org/packages/centos/$releasever/$basearch/
gpgcheck=1
enabled=1
gpgkey=https://nginx.org/keys/nginx_signing.key
module_hotfixes=true

[nginx-mainline]
name=nginx mainline repo
baseurl=http://nginx.org/packages/mainline/centos/$releasever/$basearch/
gpgcheck=1
enabled=0
gpgkey=https://nginx.org/keys/nginx_signing.key
module_hotfixes=true
# yum-config-manager --enable nginx-mainline
# dnf install nginx
nginx stable repo                                                                                         18 kB/s |  19 kB     00:01
nginx mainline repo                                                                                       19 kB/s |  22 kB     00:01
Dependencies resolved.
=========================================================================================================================================
 Package                    Architecture                Version                                  Repository                         Size
=========================================================================================================================================
Installing:
 nginx                      x86_64                      1:1.24.0-1.el9.ngx                       nginx-stable                      868 k

Transaction Summary
=========================================================================================================================================
Install  1 Package

Total download size: 868 k
Installed size: 3.0 M
Is this ok [y/N]:

↑nginx 1.24の最新版がインストール出来ます。


(略)

Installed:
  nginx-1:1.24.0-1.el9.ngx.x86_64

Complete!
↑ nginx 1.24 がインストールされました。
# systemctl start nginx
# systemctl status nginx
● nginx.service - nginx - high performance web server
     Loaded: loaded (/usr/lib/systemd/system/nginx.service; disabled; vendor preset: disabled)
    Drop-In: /usr/lib/systemd/system/nginx.service.d
             └─php-fpm.conf
     Active: active (running) since Sun 2023-XX-XX XX:XX:XX JST; 1s ago
       Docs: http://nginx.org/en/docs/
    Process: 2277 ExecStart=/usr/sbin/nginx -c /etc/nginx/nginx.conf (code=exited, status=0/SUCCESS)
   Main PID: 2278 (nginx)
      Tasks: 4 (limit: 12316)
     Memory: 3.7M
        CPU: 17ms
     CGroup: /system.slice/nginx.service
             ├─2278 "nginx: master process /usr/sbin/nginx -c /etc/nginx/nginx.conf"
             ├─2279 "nginx: worker process"
             ├─2280 "nginx: worker process"
             └─2281 "nginx: worker process"


# systemctl enable nginx
Created symlink /etc/systemd/system/multi-user.target.wants/nginx.service → /usr/lib/systemd/system/nginx.service.
↑nginx を起動させて、再起動後も、自動起動をするようにします。
firewall
firewallにて、80番と443番を開けます。
# firewall-cmd --list-all
public (active)
  target: default
  icmp-block-inversion: no
  interfaces: eth0
  sources:
  services: cockpit dhcpv6-client ssh
  ports:
  protocols:
  forward: yes
  masquerade: no
  forward-ports:
  source-ports:
  icmp-blocks:
↑現状では、http(89)、https(443)は、空いていません。
# firewall-cmd --zone=public --add-service=http --permanent
success
# firewall-cmd --zone=public --add-service=https --permanent
success
# firewall-cmd --reload
success
↑空きました。
Nginx 設定 その1 http
http(80ポート)の設定を行います。
server {
        listen 80;
        server_name (FQDN);

        location / {
                root  /var/www/html;

        }

        location ~ \.php$ {
                root  /var/www/html;
                fastcgi_pass   unix:/run/php-fpm/www.sock;
                fastcgi_index  index.php;
                fastcgi_param  SCRIPT_FILENAME  $document_root$fastcgi_script_name;
                include        fastcgi_params;
        }
}
Let’s Encrypt(無料SSL)
# dnf install certbot

Dependencies resolved.
==================================================================================================================================================================
 Package                                         Architecture                    Version                                 Repository                          Size
==================================================================================================================================================================
Installing:
 certbot                                         noarch                          2.5.0-3.el9                             epel                                17 k
Installing dependencies:
 fontawesome-fonts                               noarch                          1:4.7.0-13.el9                          appstream                          204 k
 python3-acme                                    noarch                          2.5.0-3.el9                             epel                               160 k
 python3-certbot                                 noarch                          2.5.0-3.el9                             epel                               643 k
↑certbotをインストールします。
# /usr/bin/certbot certonly --webroot -w /var/www/html -d (FQDN) --renew-by-default --email (メールアドレス)
Saving debug log to /var/log/letsencrypt/letsencrypt.log

(略)

Successfully received certificate.
Certificate is saved at: /etc/letsencrypt/live/(FQDN)/fullchain.pem
Key is saved at:         /etc/letsencrypt/live/(FQDN)/privkey.pem
This certificate expires on 2023-XX-XX.
These files will be updated when the certificate renews.
Certbot has set up a scheduled task to automatically renew this certificate in the background.

- - - - - - - - - - - - - - - - - - - - - - - - - - - - - - - - - - - - - - - -
If you like Certbot, please consider supporting our work by:
 * Donating to ISRG / Let's Encrypt:   https://letsencrypt.org/donate
 * Donating to EFF:                    https://eff.org/donate-le
- - - - - - - - - - - - - - - - - - - - - - - - - - - - - - - - - - - - - - - -
↑SSL(TSL)の証明書が発行されました。
Nginx 設定 その2 https
https(443ポート)の設定をします。
# openssl dhparam -out /etc/nginx/dhparam.pem 2048
↑dhparamを作成します。
server {
        listen       443 ssl http2;
        server_name  (FQDN);

        ssl_certificate     /etc/letsencrypt/live/(FQDN)/fullchain.pem;
        ssl_certificate_key /etc/letsencrypt/live/(FQDN)/privkey.pem;
        ssl_trusted_certificate /etc/letsencrypt/live/(FQDN)/fullchain.pem;


        ssl_session_timeout 1d;
        ssl_session_cache shared:SSL:50m;
        ssl_session_tickets off;
        ssl_dhparam /etc/nginx/dhparam.pem;
        ssl_protocols TLSv1.2 TLSv1.3;
        ssl_ciphers 'ECDHE-ECDSA-CHACHA20-POLY1305:ECDHE-RSA-CHACHA20-POLY1305:ECDHE-ECDSA-AES128-GCM-SHA256:ECDHE-RSA-AES128-GCM-SHA256:ECDHE-ECDSA-AES256-GCM-SHA384:ECDHE-RSA-AES256-GCM-SHA384:DHE-RSA-AES128-GCM-SHA256:DHE-RSA-AES256-GCM-SHA384:ECDHE-ECDSA-AES128-SHA256:ECDHE-RSA-AES128-SHA256:ECDHE-ECDSA-AES128-SHA:ECDHE-RSA-AES256-SHA384:ECDHE-RSA-AES128-SHA:ECDHE-ECDSA-AES256-SHA384:ECDHE-ECDSA-AES256-SHA:ECDHE-RSA-AES256-SHA:DHE-RSA-AES128-SHA256:DHE-RSA-AES128-SHA:DHE-RSA-AES256-SHA256:DHE-RSA-AES256-SHA:ECDHE-ECDSA-DES-CBC3-SHA:ECDHE-RSA-DES-CBC3-SHA:EDH-RSA-DES-CBC3-SHA:AES128-GCM-SHA256:AES256-GCM-SHA384:AES128-SHA256:AES256-SHA256:AES128-SHA:AES256-SHA:DES-CBC3-SHA:!DSS';
        ssl_prefer_server_ciphers on;
        add_header Strict-Transport-Security max-age=15768000;
        ssl_stapling on;
        ssl_stapling_verify on;


        location / {
                root  /var/www/html;
        }
        location ~ \.php$ {
                root  /var/www/html;
                fastcgi_pass   unix:/run/php-fpm/www.sock;
                fastcgi_index  index.php;
                fastcgi_param  SCRIPT_FILENAME  $document_root$fastcgi_script_name;
                include        fastcgi_params;
        }

}
↑nginxの設定です。
# /usr/sbin/nginx -t
nginx: the configuration file /etc/nginx/nginx.conf syntax is ok
nginx: configuration file /etc/nginx/nginx.conf test is successful
↑nginxの設定をチェックします。
# systemctl restart nginx
↑再起動をして、https(443ポート)を有効にします。
Nginx 設定 その3 gzip
nginx のgzipの設定をします。
# curl -I -H 'Accept-Encoding: gzip,deflate' https://(FQDN)/xx.php
HTTP/1.1 200 OK
Server: nginx/1.24.0
Date: XXX, XX May 2023 XX:XX:XX GMT
Content-Type: text/html; charset=UTF-8
Connection: keep-alive
X-Powered-By: PHP/8.1.8
Strict-Transport-Security: max-age=15768000
↑gzipは、有効にはなっていないようです。
# vi /etc/nginx/nginx.conf

http {
    (略)

    gzip              on;
    gzip_http_version 1.0;
    gzip_types        text/plain
                      text/xml
                      text/css
                      application/xml
                      application/xhtml+xml
                      application/rss+xml
                      application/atom_xml
                      application/javascript
                      application/x-javascript
                      application/x-httpd-php;
    gzip_disable      "MSIE [1-6]\.";
    gzip_disable      "Mozilla/4";
    gzip_comp_level   1;
    gzip_proxied      any;
    gzip_vary         on;
    gzip_buffers      4 8k;
    gzip_min_length   1100;

    (略)


}
↑上記を設定して、nginxを再起動させます。
# curl -I -H 'Accept-Encoding: gzip,deflate' https://(FQDN)/xx.php
HTTP/1.1 200 OK
Server: nginx/1.24.0
Date: XXX, XX May 2023 XX:XX:XX GMT
Content-Type: text/html; charset=UTF-8
Connection: keep-alive
Vary: Accept-Encoding
X-Powered-By: PHP/8.1.8
Strict-Transport-Security: max-age=15768000
Content-Encoding: gzip
↑gzipが有効になりました。(最後の行)
WordPress用MySQL
wordpress用の、MySQLを設定します。
# mysql -u root -p

mysql> create database wp_db;
Query OK, 1 row affected (0.01 sec)


mysql> create user 'wp_user'@'localhost' identified by '(DB用パスワード)';
Query OK, 0 rows affected (0.01 sec)

mysql> grant all privileges on wp_db.* to 'wp_user'@'localhost';
Query OK, 0 rows affected (0.01 sec)

mysql> flush privileges;
Query OK, 0 rows affected (0.01 sec)
↑データベース名:wp_db
ユーザ名:wp_user
パスワード:(DB用パスワード)
とします。
WordPress本体
# wget https://ja.wordpress.org/latest-ja.tar.gz
--2023-XX-XX XX:XX:XX--  https://ja.wordpress.org/latest-ja.tar.gz
Resolving ja.wordpress.org (ja.wordpress.org)... 198.143.164.252
Connecting to ja.wordpress.org (ja.wordpress.org)|198.143.164.252|:443... connected.
HTTP request sent, awaiting response... 200 OK
Length: 23836030 (23M) [application/octet-stream]
Saving to: ‘latest-ja.tar.gz’

latest-ja.tar.gz                         100%[================================================================================>]  22.73M  10.4MB/s    in 2.2s

2023-XX-XX XX:XX:XX (10.4 MB/s) - ‘latest-ja.tar.gz’ saved [23836030/23836030]
↑Wordpress本体をダウンロードします。
# tar xzvf latest-ja.tar.gz
↑解凍をします。
# cp -a wordpress/ /var/www/
# mv html html.back
# mv wordpress/ html
↑本来の設置場所に置きます。
# cd html
# cp wp-config-sample.php wp-config.php
↑「wp-config.php」を設定変更します。
# vi wp-config.php

define( 'DB_NAME', 'database_name_here' );
define( 'DB_USER', 'username_here' );
define( 'DB_PASSWORD', 'password_here' );

 ↓

define( 'DB_NAME', 'wp_db' );
define( 'DB_USER', 'wp_user' );
define( 'DB_PASSWORD', '(DB用パスワード)' );
↑DBの設定をします。
define('AUTH_KEY', 'XXXXXXXXXXXXXXXXXXXXXXXXXXXXXXXXXXXXXXXXXXXXXXXXXXXXXXXXXXXXXXXX');
↑上記で始まる行を

で表示された行に置き換えます。
Nginx wordpress用設定
# vi /etc/nginx/conf.d/xxxxx.conf

server {
        listen       443 ssl http2;
        server_name  (FQDN);

        (略)
        location / {
                root  /var/www/html;
                index  index.php index.html; # ※ 追加
        }
        (略)

}
↑1行追加
# dnf install php-mysqlnd
↑mysql接続用のモジュールを入れます。
# systemctl restart php-fpm
# systemctl restart nginx
↑再起動をして、https://(FQDN)/ にアクセスします。
画面上から、ログイン名やパスワードなどを設定します。
# vi /etc/nginx/conf.d/xxxxx.conf

server {
        listen       443 ssl http2;
        server_name  (FQDN);

        (略)
        location / {
                root  /var/www/html;
                index  index.php index.html;
        }

        ↓

        location / {
                root  /var/www/html;
                index  index.php index.html;
                try_files $uri $uri/ /index.php?$args; # ※追加
        }

        (略)

}
↑パーマリンクが有効になるように設定を追加します。
Nginx proxy cache
高速にアクセスできるように、nginxの、proxy キャッシュを設定します。
# vi /etc/nginx/nginx.conf

http{

    (略)


    proxy_cache_path /var/cache/nginx/cache1 levels=1:2 keys_zone=c_zone1:1m inactive=1d max_size=1g;
    proxy_temp_path  /var/cache/nginx_tmp;
    proxy_cache_valid  200 302 60m;
    proxy_cache_valid  404 10m;

    (略)
}
↑基本部分です。「c_zone1」というは、任意の名前です(違う名前でも大丈夫)。
server {
        listen       443 ssl http2;
        server_name  (FQDN);

        ssl_certificate     /etc/letsencrypt/live/(FQDN)/fullchain.pem;
        ssl_certificate_key /etc/letsencrypt/live/(FQDN)/privkey.pem;
        ssl_trusted_certificate /etc/letsencrypt/live/(FQDN)/fullchain.pem;


        ssl_session_timeout 1d;
        ssl_session_cache shared:SSL:50m;
        ssl_session_tickets off;
        ssl_dhparam /etc/nginx/dhparam.pem;
        ssl_protocols TLSv1.2 TLSv1.3;
        ssl_ciphers 'ECDHE-ECDSA-CHACHA20-POLY1305:ECDHE-RSA-CHACHA20-POLY1305:ECDHE-ECDSA-AES128-GCM-SHA256:ECDHE-RSA-AES128-GCM-SHA256:ECDHE-ECDSA-AES256-GCM-SHA384:ECDHE-RSA-AES256-GCM-SHA384:DHE-RSA-AES128-GCM-SHA256:DHE-RSA-AES256-GCM-SHA384:ECDHE-ECDSA-AES128-SHA256:ECDHE-RSA-AES128-SHA256:ECDHE-ECDSA-AES128-SHA:ECDHE-RSA-AES256-SHA384:ECDHE-RSA-AES128-SHA:ECDHE-ECDSA-AES256-SHA384:ECDHE-ECDSA-AES256-SHA:ECDHE-RSA-AES256-SHA:DHE-RSA-AES128-SHA256:DHE-RSA-AES128-SHA:DHE-RSA-AES256-SHA256:DHE-RSA-AES256-SHA:ECDHE-ECDSA-DES-CBC3-SHA:ECDHE-RSA-DES-CBC3-SHA:EDH-RSA-DES-CBC3-SHA:AES128-GCM-SHA256:AES256-GCM-SHA384:AES128-SHA256:AES256-SHA256:AES128-SHA:AES256-SHA:DES-CBC3-SHA:!DSS';
        ssl_prefer_server_ciphers on;
        add_header Strict-Transport-Security max-age=15768000;
        ssl_stapling on;
        ssl_stapling_verify on;


        proxy_set_header    X-Real-IP       $remote_addr;
        proxy_set_header    X-Forwarded-Proto $scheme;
        proxy_set_header    X-Forwarded-For $proxy_add_x_forwarded_for;
        proxy_set_header    Host            $http_host;

        location / {

            if ($http_user_agent ~* '(DoCoMo|UP.Browser|SoftBank|WILLCOM|emobile|iPhone|iPod|Android.*Mobile)') {
                set $mobilef '.mob';
            }

            if ($request_method != GET) {
                set $do_not_cache 1;
            }
            if ($http_cookie ~* 'comment_author|wordpress_[a-f0-9]+|wp-postpass|wordpress_no_cache|wordpress_logged_in') {
                set $do_not_cache 1;
            }

            proxy_set_header Host $http_host;
            proxy_set_header X-Real-IP $remote_addr;
            proxy_set_header X-Forwarded-Proto https;
            proxy_set_header X-Forwarded-Port 443;
            proxy_set_header X-Forwarded-Host $host;
            proxy_set_header X-Forwarded-For $proxy_add_x_forwarded_for;

            proxy_pass      http://localhost:8011;

            proxy_no_cache     $do_not_cache;
            proxy_cache_bypass $do_not_cache;
            proxy_cache c_zone1;
            proxy_cache_key $scheme$proxy_host$uri$is_args$args$mobilef;
            add_header X-Cache-Status $upstream_cache_status;

       }


}

server {
        listen 8011;
        root /var/www/html;
        server_name  (FQDN);


        location / {
                root  /var/www/html;
                index  index.php index.html;
                try_files $uri $uri/ /index.php?$args;
        }
        location ~ \.php$ {
                root  /var/www/html;
                fastcgi_pass   unix:/run/php-fpm/www.sock;
                fastcgi_index  index.php;
                fastcgi_param  SCRIPT_FILENAME  $document_root$fastcgi_script_name;
                include        fastcgi_params;
        }


}
↑「proxy_cache c_zone1;」の「c_zone1」は、違うところで、設定した名称です。
「8011」は、この数字でなくても大丈夫です。
エラー「ページの自動転送設定が正しくありません」
画面にアクセスすると、
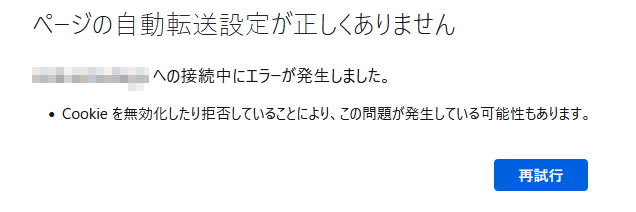
ページの自動転送設定が正しくありません

(FQDN) への接続中にエラーが発生しました。

    Cookie を無効化したり拒否していることにより、この問題が発生している可能性もあります。
と、出たら、
wp-config.php
に
$_SERVER['HTTPS'] = 'on';
と、加えると解消します。