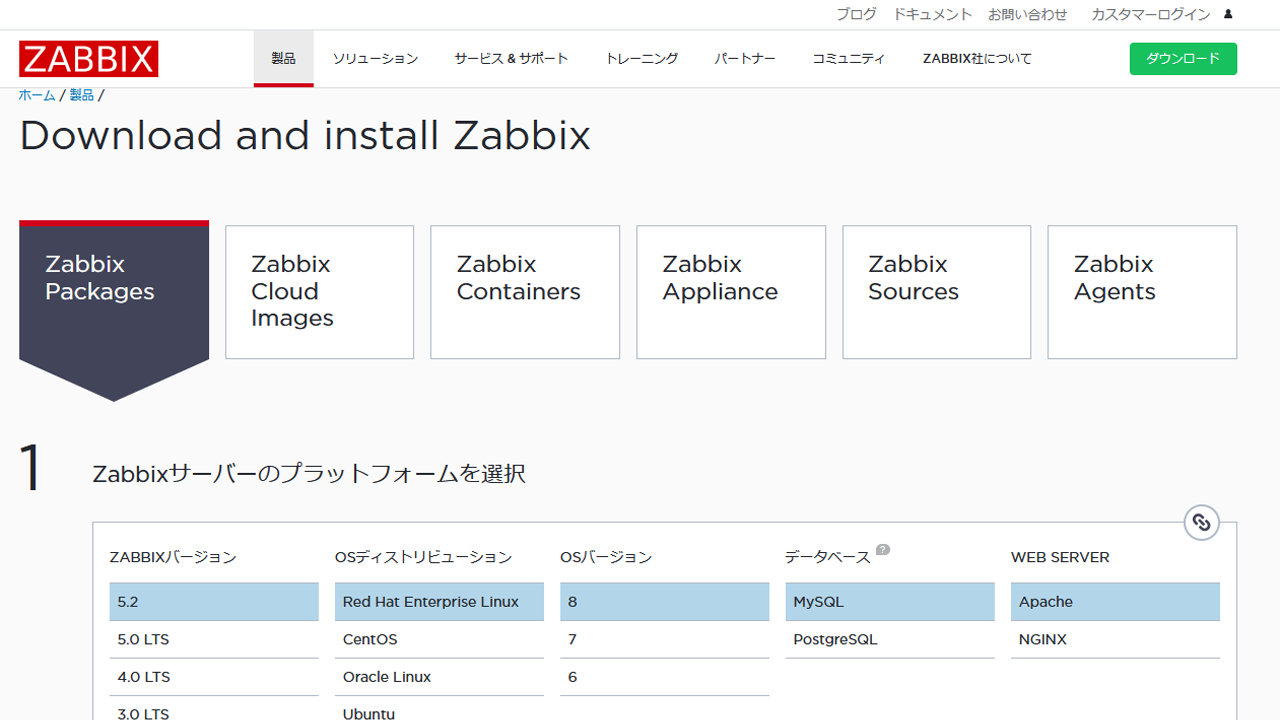
Zabbixのインストール履歴です。CentOS7に最新版を、ソースでインストールします。
Zabbixとは
Zabbixはオープンソース・ソフトウェアとして開発されており、無料でダウンロードいただくことが可能です。

より
Zabbixでは、サーバーの状態監視と、異常検出を行います。
サーバーの状態監視は、
・MRTG
・Cacti
・Munin
などの無料ツールがあります。
流石に、MRTGは、過去の産物でしょう・・・
いずれも、Zabbixと同様に、SNMPの情報をサーバーから取得して、見やすいようにグラフ化をします。
Zabbixサーバーとして1台のサーバーが必要です。
その他監視したいサーバーに「Zabbix Agent」をインストールします。
Zabbixサーバーでは、MySQL(もしくは、PostgreSQL)、Web(Apapche、もしくはNginx)が必要です。
Zabbix CentOS版
この原稿作成時点で、Zabbix 5.2 が最新版(安定版)です。
CentOS7にyum でインストールできる最新版は、Zabbix 5.0です。
最新版の、Zabbix 5.2 を、yumでインストールできるのは、CentOS8になります。
つまり、CentOS7では、前のバージョンの、Zabbix 5.0しかありません。
Zabbix 5.2の最新版を、CentOS7に入れるには、ソースからインストールするしかありません。
CentOS7に、yumで入れるバージョンの記録は、↑になります。
今回、ソースで、最新版を入れてみます。

↑ 「Zabbix Agent」の設定
Zabbix 環境設定 / インストール
ここでは、
・対象は、CentOS7、MySQLバージョン(PostgreSQLバージョンもあります)
・MySQL 5.7 では、既に稼働中
・WEBシステムは、既に稼働中
という前提です。
# groupadd --system zabbix
# useradd --system -g zabbix -d /usr/lib/zabbix -s /sbin/nologin -c "Zabbix Monitoring System" zabbix
# mkdir -m u=rwx,g=rwx,o= -p /usr/lib/zabbix
# chown zabbix:zabbix /usr/lib/zabbix
↑ ユーザ、グループ、ホームを設定します。
# wget https://cdn.zabbix.com/zabbix/sources/stable/5.2/zabbix-5.2.5.tar.gz
# tar xzvf zabbix-5.2.5.tar.gz
# cd zabbix-5.2.5
↑ ソースをダウンロードして、解凍をします。
# ./configure --enable-server --enable-agent --with-mysql --enable-ipv6 --with-net-snmp --with-libcurl --with-libxml2

checking for libevent support... no
configure: error: Unable to use libevent (libevent check failed)
↑ エラーとなりました
# yum install libevent libevent-devel
↑ 必要ライブラリを入れます。
# ./configure --enable-server --enable-agent --with-mysql --enable-ipv6 --with-net-snmp --with-libcurl --with-libxml2

Configuration:

  Detected OS:           linux-gnu
  Install path:          /usr/local
  Compilation arch:      linux

  Compiler:              cc
  Compiler flags:         -g -O2

  Library-specific flags:
    database:              -I/usr/include/mysql -m64
    libXML2:               -I/usr/include/libxml2
    Net-SNMP:               -I/usr/local/include -I/usr/lib64/perl5/CORE -I. -I/usr/include

  Enable server:         yes
  Server details:
    With database:         MySQL
    WEB Monitoring:        cURL
      SSL certificates:      /usr/local/share/zabbix/ssl/certs
      SSL keys:              /usr/local/share/zabbix/ssl/keys
    SNMP:                  yes
    IPMI:                  no
    SSH:                   no
    TLS:                   no
    ODBC:                  no
    Linker flags:            -L/usr/lib64/mysql       -L/usr/lib64          -rdynamic
    Libraries:              -lmysqlclient  -lpthread -lm -lrt -ldl    -lxml2    -lnetsnmp    -lz -lpthread -levent    -lcurl -lm -ldl  -lresolv  -lpcre
    Configuration file:    /usr/local/etc/zabbix_server.conf
    External scripts:      /usr/local/share/zabbix/externalscripts
    Alert scripts:         /usr/local/share/zabbix/alertscripts
    Modules:               /usr/local/lib/modules

  Enable proxy:          no

  Enable agent:          yes
  Agent details:
    TLS:                   no
    Modbus:                no
    Linker flags:                -rdynamic
    Libraries:              -lz -lpthread    -lcurl -lm -ldl  -lresolv  -lpcre
    Configuration file:    /usr/local/etc/zabbix_agentd.conf
    Modules:               /usr/local/lib/modules

  Enable agent 2:        no

  Enable Java gateway:   no

  LDAP support:          no
  IPv6 support:          yes

***********************************************************
*            Now run 'make install'                       *
*                                                         *
*            Thank you for using Zabbix!                  *
*              <http://www.zabbix.com>                    *
***********************************************************
↑「configure」が通りました。
# make install
Making install in src
make[1]: Entering directory `/home/xxxx/src/zabbix-5.2.5/src'
Making install in libs
make[2]: Entering directory `/home/xxxx/src/zabbix-5.2.5/src/libs'
Making install in zbxcrypto
make[3]: Entering directory `/home/xxxx/src/zabbix-5.2.5/src/libs/zbxcrypto'

(略)

make[2]: Nothing to be done for `install-data-am'.
make[2]: Leaving directory `/home/xxxx/src/zabbix-5.2.5/misc'
make[1]: Leaving directory `/home/xxxx/src/zabbix-5.2.5/misc'
make[1]: Entering directory `/home/xxxx/src/zabbix-5.2.5'
make[2]: Entering directory `/home/xxxx/src/zabbix-5.2.5'
make[2]: Nothing to be done for `install-exec-am'.
make[2]: Nothing to be done for `install-data-am'.
make[2]: Leaving directory `/home/xxxx/src/zabbix-5.2.5'
make[1]: Leaving directory `/home/xxxx/src/zabbix-5.2.5'
↑ インストール完了しました
Zabbix 用 MySQL設定
CREATE DATABASE zabbix_db character set utf8 collate utf8_bin;
↑ DBを作成します。「character set utf8 collate utf8_bin」は重要です。
違う文字コードを指定した場合、
Zabbix supports only "utf8_bin" collation. Database "zabbix_db" has default collation "utf8_general_ci"
character set name or collation name that is not supported by Zabbix found in 442 column(s) of database "zabbix_db"
only character set "utf8" and collation "utf8_bin" should be used in database
↑ というエラーが出てきます。
insert into db (host,db,user) values ('localhost','zabbix_db','zabbix_user');

update db set Select_priv='Y',Insert_priv='Y',Update_priv='Y',Delete_priv='Y',Create_priv='Y',Drop_priv='Y',Grant_priv='Y',References_priv='Y',Index_priv='Y',Alter_priv='Y',Create_tmp_table_priv='Y',Lock_tables_priv='Y',Create_view_priv='Y',Show_view_priv='Y',Create_routine_priv='Y',Alter_routine_priv='Y',Execute_priv='Y',Event_priv='Y',Trigger_priv='Y' where db='zabbix_db';

insert into user (host,User,authentication_string,ssl_cipher,x509_issuer,x509_subject) values ('localhost','zabbix_user',password('(パスワード)'),'','','');
↑ DBの設定を行います。
# mysql -u zabbix_user -p zabbix_db < database/mysql/schema.sql
Enter password:
# mysql -u zabbix_user -p zabbix_db < database/mysql/images.sql
Enter password:
# mysql -u zabbix_user -p zabbix_db < database/mysql/data.sql
Enter password:
#
↑ zabbix用のDBをインストールします。
# vi /usr/local/etc/zabbix_server.conf

#DBName=zabbix
DBName=zabbix_db

#DBUser=zabbix
DBUser=zabbix_user

# DBPassword=
DBPassword=(パスワード)


# DBSocket=
DBSocket=/var/lib/mysql/mysql.sock

# PidFile=/tmp/zabbix_server.pid
PidFile=/tmp/zabbix_server.pid
↑ Zabbix-server用の設定を書き込みます。
zabbix-Server、起動
vi /usr/lib/systemd/system/zabbix-server.service

--------------------------------------------------------------------

[Unit]
Description=Zabbix Server
After=syslog.target
After=network.target
After=mysql.service
After=mysqld.service

[Service]
Environment="CONFFILE=/usr/local/etc/zabbix_server.conf"
EnvironmentFile=-/etc/sysconfig/zabbix-server
Type=forking
Restart=on-failure
PIDFile=/tmp/zabbix_server.pid
KillMode=control-group
ExecStart=/usr/local/sbin/zabbix_server -c $CONFFILE
ExecStop=/bin/kill -SIGTERM $MAINPID
RestartSec=10s
TimeoutSec=0

[Install]
WantedBy=multi-user.target


--------------------------------------------------------------------
↑ Zabbix-Serverの起動ファイルを作成します。
# systemctl start zabbix-server

# systemctl status zabbix-server
● zabbix-server.service - Zabbix Server
   Loaded: loaded (/usr/lib/systemd/system/zabbix-server.service; disabled; vendor preset: disabled)
   Active: active (running) since Fri 2021-XX-XX XX:XX:XX JST;
  Process: 28842 ExecStop=/bin/kill -SIGTERM $MAINPID (code=exited, status=0/SUCCESS)
  Process: 28845 ExecStart=/usr/local/sbin/zabbix_server -c $CONFFILE (code=exited, status=0/SUCCESS)
 Main PID: 28847 (zabbix_server)
   CGroup: /system.slice/zabbix-server.service
↑ Zabbix-Serverが起動しました。
systemd: zabbix-server.service holdoff time over, scheduling restart.
systemd: Stopped Zabbix Server.
systemd: Starting Zabbix Server...
systemd: Can't open PID file /run/zabbix/zabbix_server.pid (yet?) after start: No such file or directory
systemd: zabbix-server.service never wrote its PID file. Failing.
systemd: Failed to start Zabbix Server.
systemd: Unit zabbix-server.service entered failed state.
systemd: zabbix-server.service failed.
↑ というよう「Failed to start Zabbix Server」となって、起動しなかった場合、
/usr/lib/systemd/system/zabbix-server.service
で指定している、PIDと、
/usr/local/etc/zabbix_server.conf
で指定している、PIDが食い違っていることがあります。
両者のPIDを一致させましょう。
Zabbix-Agent、起動
# vi /usr/local/etc/zabbix_agentd.conf

Hostname=Zabbix server
↓
Hostname=(ホスト名)

Server=127.0.0.1
↑zabbix_serverが起動しているIPを指定します。
vi /usr/lib/systemd/system/zabbix-agent.service

---------------------------------------------------------------
[Unit]
Description=Zabbix Agent
After=syslog.target
After=network.target

[Service]
Environment="CONFFILE=/usr/local/etc/zabbix_agentd.conf"
EnvironmentFile=-/etc/sysconfig/zabbix-agent
Type=forking
Restart=on-failure
PIDFile=/tmp/zabbix_agentd.pid
KillMode=control-group
ExecStart=/usr/local/sbin/zabbix_agentd -c $CONFFILE
ExecStop=/bin/kill -SIGTERM $MAINPID
RestartSec=10s
User=zabbix
Group=zabbix

[Install]
WantedBy=multi-user.target
---------------------------------------------------------------
↑ Zabbix-agent の起動スクリプトを作成します。
# systemctl start zabbix-agent

# systemctl status zabbix-agent
● zabbix-agent.service - Zabbix Agent
   Loaded: loaded (/usr/lib/systemd/system/zabbix-agent.service; disabled; vendor preset: disabled)
   Active: active (running) since Fri 2021-XX-XX XX:XX:XX JST;
  Process: 28907 ExecStop=/bin/kill -SIGTERM $MAINPID (code=exited, status=0/SUCCESS)
  Process: 28910 ExecStart=/usr/local/sbin/zabbix_agentd -c $CONFFILE (code=exited, status=0/SUCCESS)
 Main PID: 28912 (zabbix_agentd)
↑ Zabbix-Agentが起動しました。
Zabbix用WEBコンテンツと設定
zabbix用コンテンツは、
「zabbix-5.2.5/ui/」
に入っています。
/home/zabbix/web/
など、「docroot」にコピーします。(例)
ブラウザからアクセスをします。
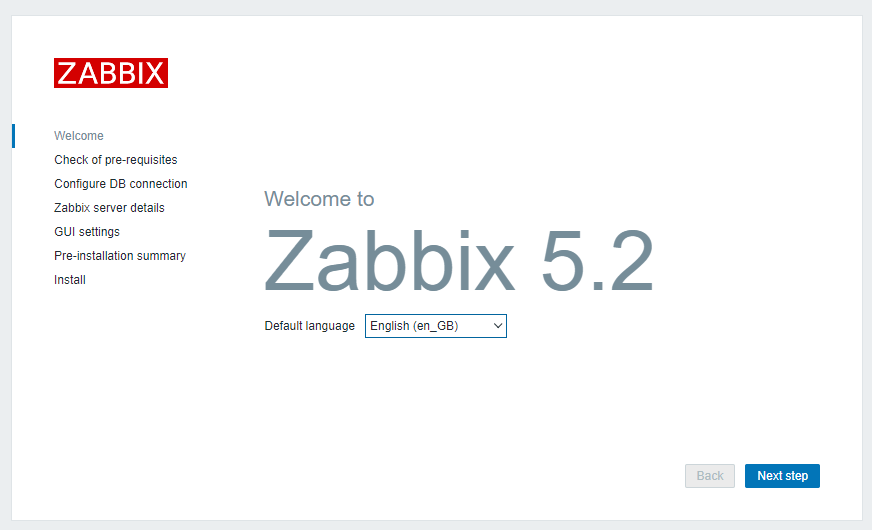
↑ Zabbix 5.2が起動しています。
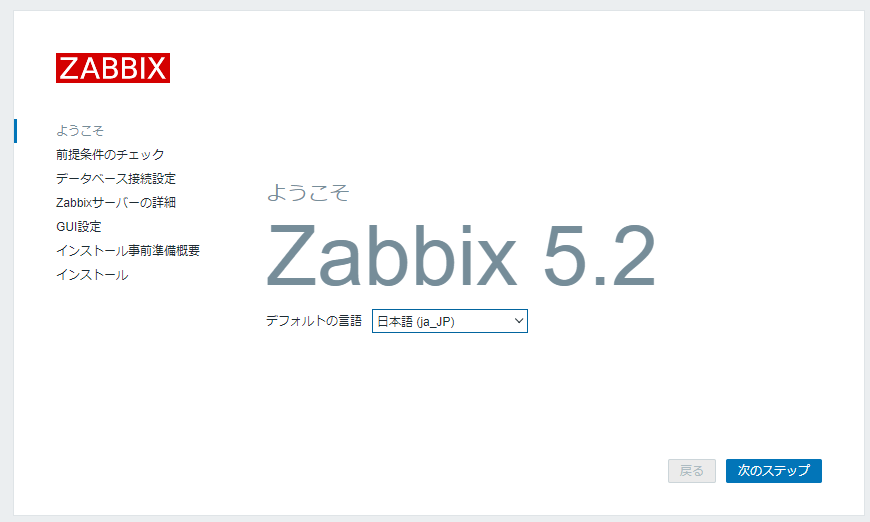
↑ デフォルトの言語を「日本語」にします。
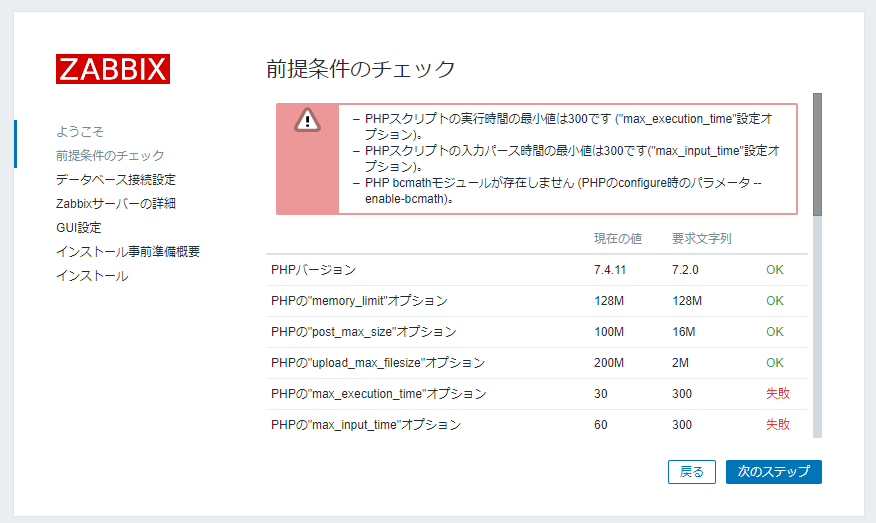
↑ phpの設定が、Zabbixの要件に合っていないです。
PHPスクリプトの実行時間の最小値は300です ("max_execution_time"設定オプション)。
PHPスクリプトの入力パース時間の最小値は300です("max_input_time"設定オプション)。
PHP bcmathモジュールが存在しません (PHPのconfigure時のパラメータ --enable-bcmath)。
↑ 今回、3つ設定が違っています。
max_execution_time = 30
 ↓
max_execution_time = 300

max_input_time = 60
 ↓
max_input_time = 300
↑「php.ini」の設定を変更します。
./configure (略)--enable-bcmath
↑ 今回の、phpは、ソースインストールをしたので、「configure」で「–enable-bcmatch」を指定して、コンパイルをしなおします。
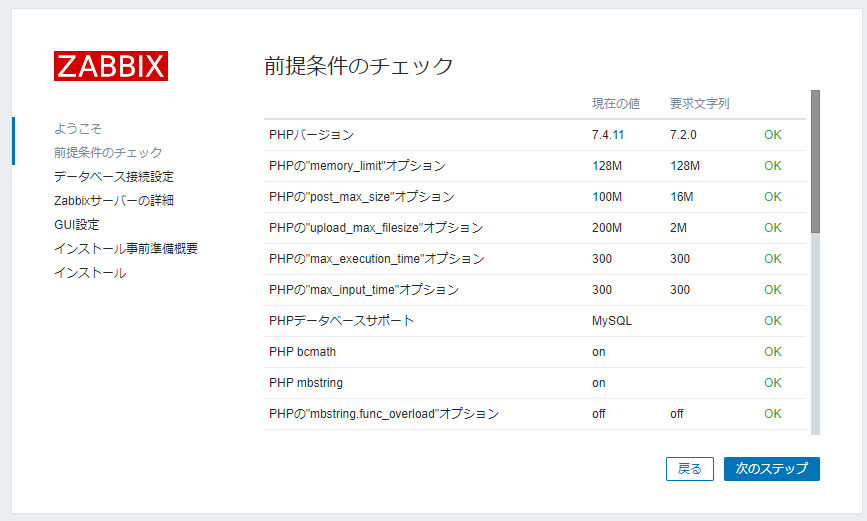
↑ 再読込を行うと、チェックに合格しています。

↑ DB情報を入れます。画面では、「socket」を指定するところがありません。
「php.ini」で、
mysqli.default_socket =
 ↓
mysqli.default_socket =/var/lib/mysql/mysql.sock
↑ と設定をします。
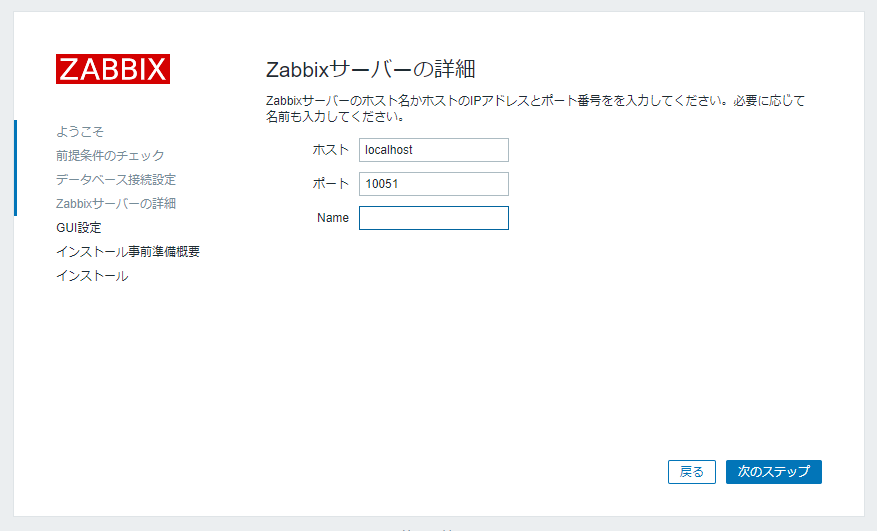
↑ このまま「次のステップ」を押します。
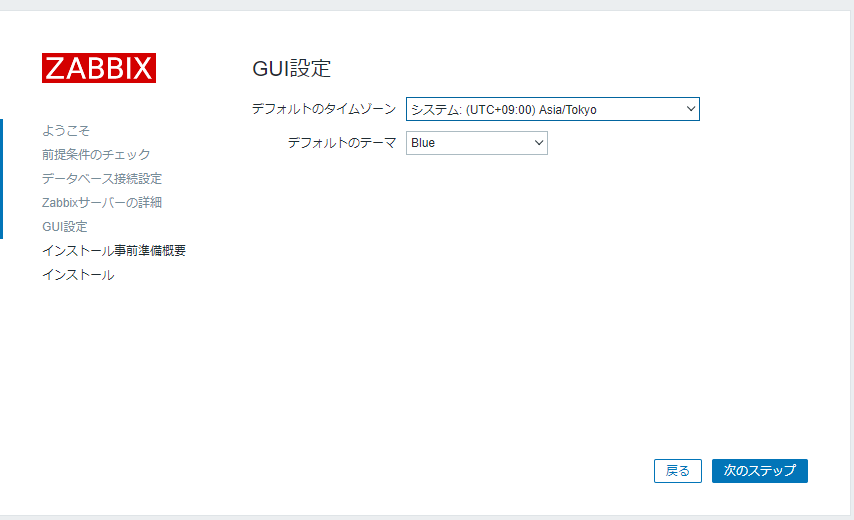
↑ こちらも、このまま「次のステップ」を押します。
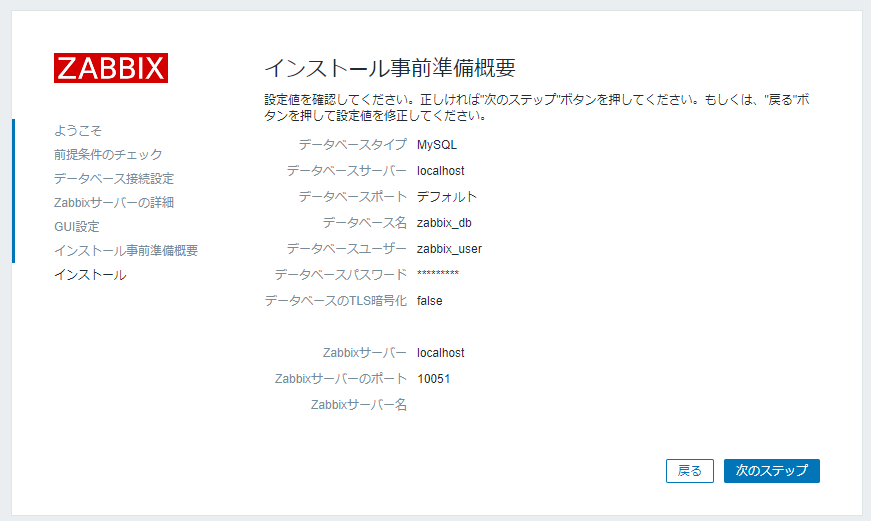
↑ 設定内容を確認のうえ、「次のステップ」を押します。

↑ インストールが完了しました。「終了」を押します。
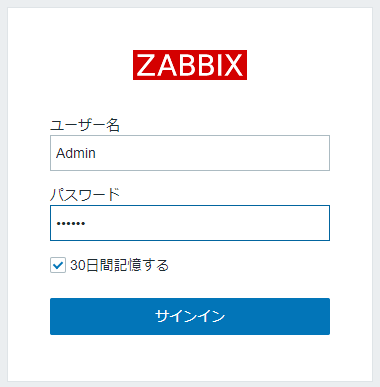
↑ 初期設定のユーザ名/パスワードを入れます。「Admin」と「zabbix」になります。

↑ ダッシュボードの画面です。
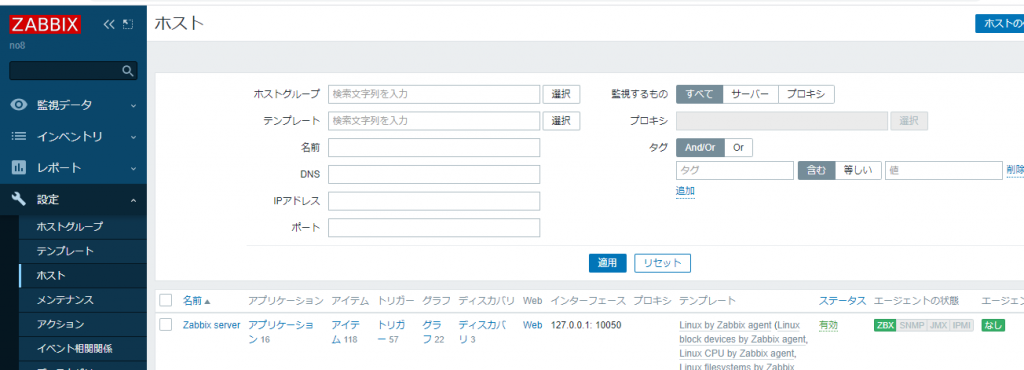
↑ 右下、「ステータス」が「有効」となっていれば、インストール成功です。

