GitlabCEにおいて、プロジェクトのバックアップの覚え書き。
GitlabCEのバージョン
# gitlab-rake gitlab:env:info

System information
System:         Ubuntu 18.04
Current User:   git
Using RVM:      no
Ruby Version:   2.7.2p137
Gem Version:    3.1.4
Bundler Version:2.1.4
Rake Version:   13.0.3
Redis Version:  5.0.9
Git Version:    2.29.0
Sidekiq Version:5.2.9
Go Version:     unknown

GitLab information
Version:        13.8.1
Revision:       7248f8bff5a
Directory:      /opt/gitlab/embedded/service/gitlab-rails
DB Adapter:     PostgreSQL
DB Version:     12.4
URL:            https://(FQDN)
HTTP Clone URL: https://(FQDN)/some-group/some-project.git
SSH Clone URL:  git@(FQDN):some-group/some-project.git
Using LDAP:     no
Using Omniauth: yes
Omniauth Providers:

GitLab Shell
Version:        13.15.0
Repository storage paths:
- default:      /var/opt/gitlab/git-data/repositories
GitLab Shell path:              /opt/gitlab/embedded/service/gitlab-shell
Git:            /opt/gitlab/embedded/bin/git
↑GitlabCE 13.8.1 です。「gitlab-rake gitlab:env:info」のコマンドは、反応が遅いです。
焦らず待ちましょう。
GitlabCE エキスポート作業
WEBにて、管理者アカウントで、アクセス
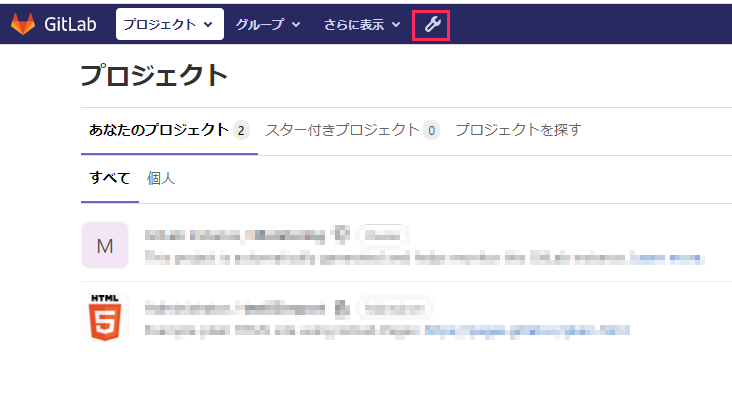
↑「さらに表示」の右側の「かぎ」をクリック
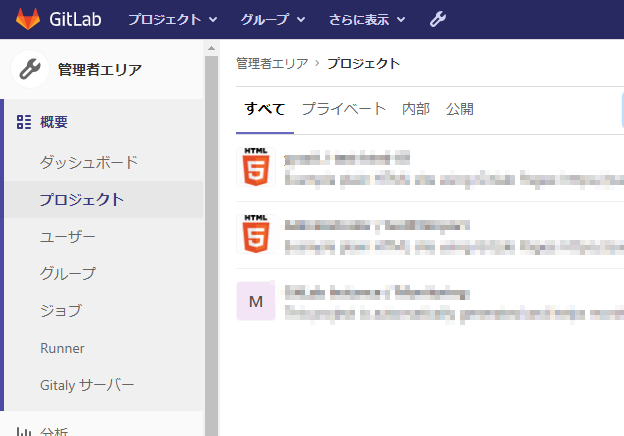
↑「概要」「プロジェクト」で、エキスポートしたいプロジェクトを選ぶ
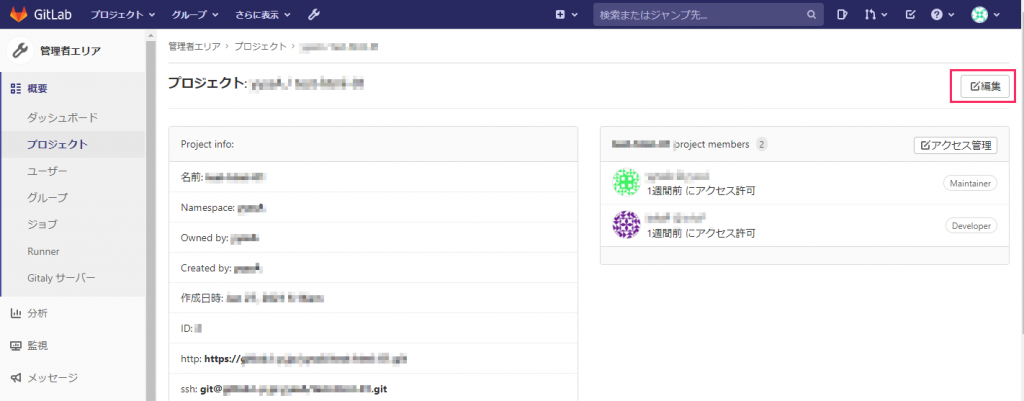
↑「プロジェクト」の概要が出てくる。右側の「編集」を選ぶ
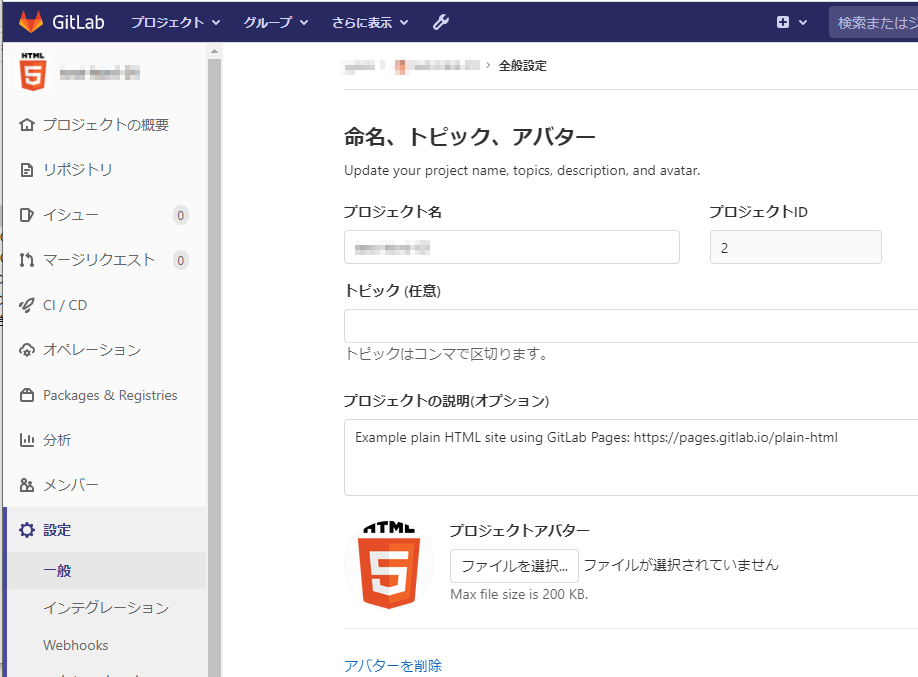
↑この画面になるので、下に移動
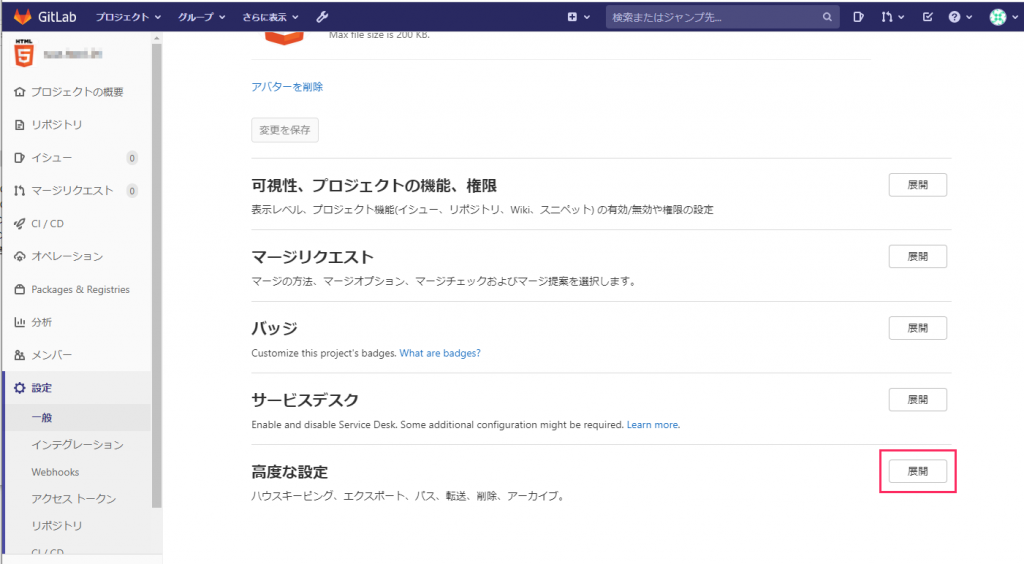
↑高度な設定 の、「展開」を選ぶ
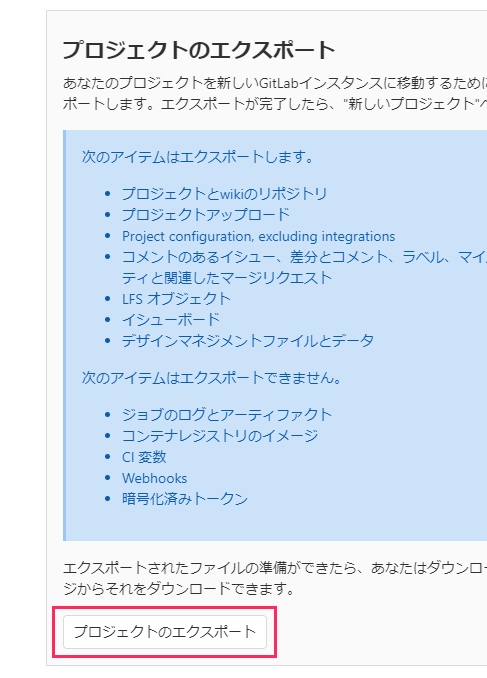
↑画面を少し、下に移動をして、「プロジェクトのエクスポート」のボタンを押す
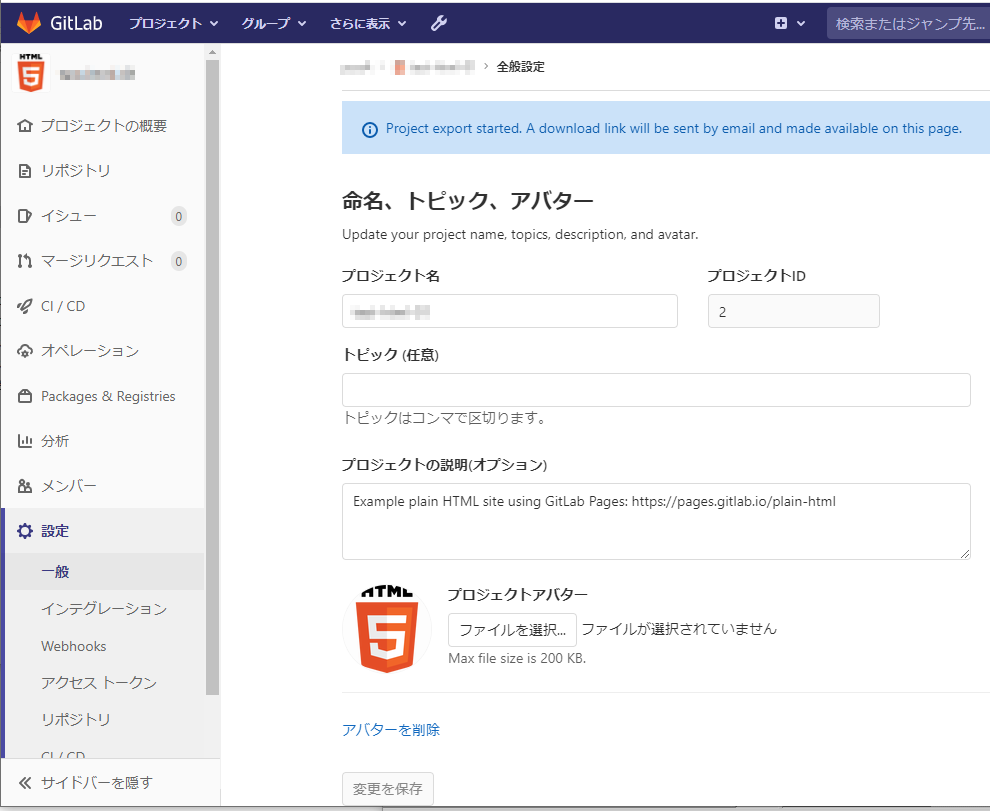
↑プロジェクトのデータがダウンロードできるようになると、メールで、通知されるか、
このページで、「ダウンロード」ができようになります」
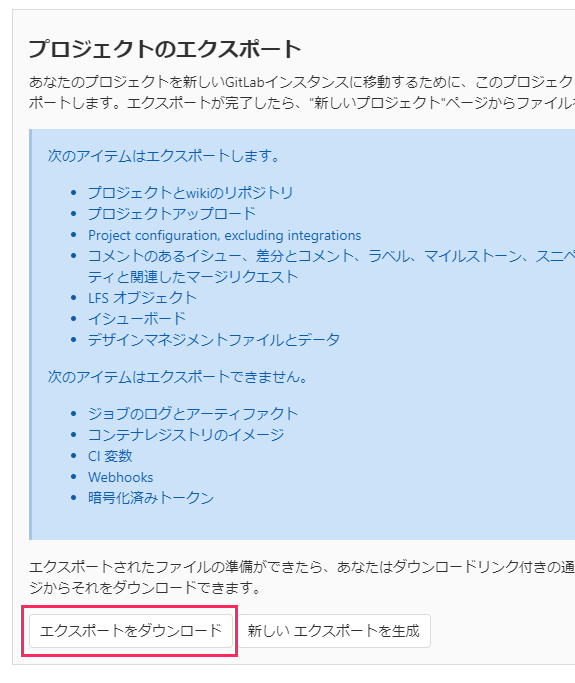
↑同じ画面で、「エキスポートをダウンロード」というボタンができています
上記の「エキスポートをダウンロード」を押します。

↑.tar.gzのエキスポートされたファイルが保存されました。

